


This guide to adding or claiming your Cylex business listing focuses on Cylex US, but for the most part, the process is the same wherever you are, whether that’s cylex-canada.ca, cylex-uk-.co.uk, or cylex-australia.com. You can see at Cylex’s worldwide directories here.
Ready for our step-by-step guide? Here we go!
How to Add a New Business Listing to Cylex
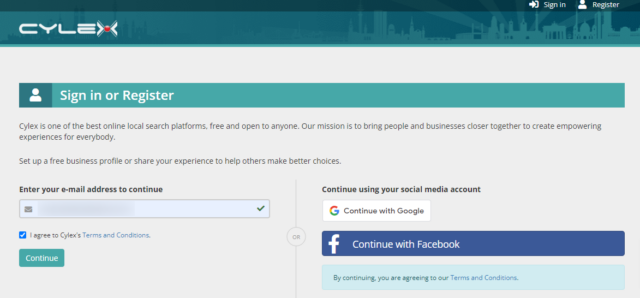
- Firstly, head to https://www.cylex.us.com/ (or find your country’s equivalent, such as cylex-canada.ca or cylex-uk.co.uk). Then log in to your account or, if you do not have one, click ‘Register’:
- Add the email address you would like to use for this account (we recommend using the business email matching your business website URL) or select the option to continue with Google or Facebook accounts.
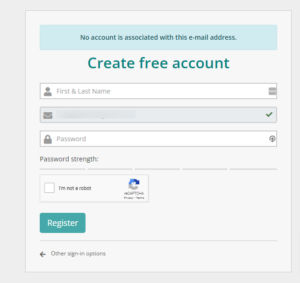
Make sure to agree to the T&Cs before proceeding. - Add your name and password:
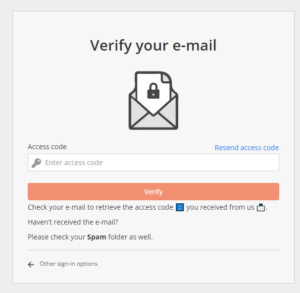
- Once you register, Cylex will need to verify your email. They will email you the code that you will need to enter into the field on the screen:
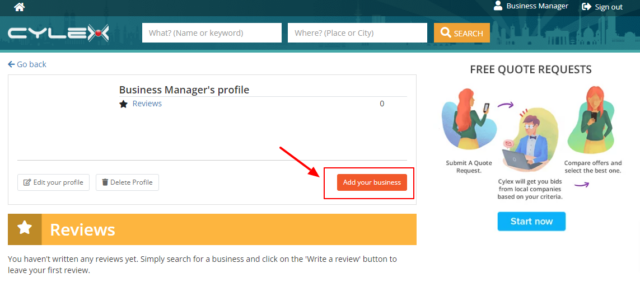
- Once verified, you will be redirected to your account page. To add your business page click on the “Add your business” button:
- From here, you simply need to add the information asked at each step:
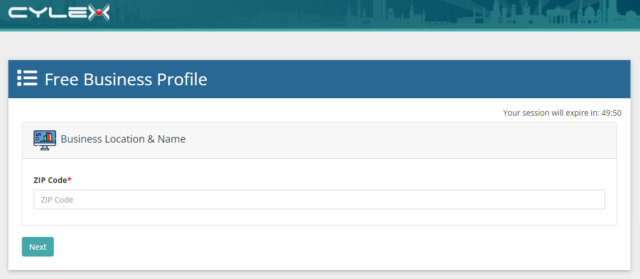
- Start with a zip code:
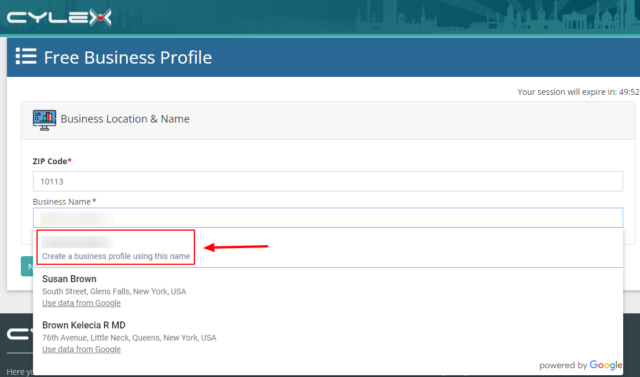
- Once the zip code is added, a new field will appear automatically for the business name: start typing the name, and you will see some suggestions appear. If they don’t match your business, select the first option that offers to create a business page using the name you just added:
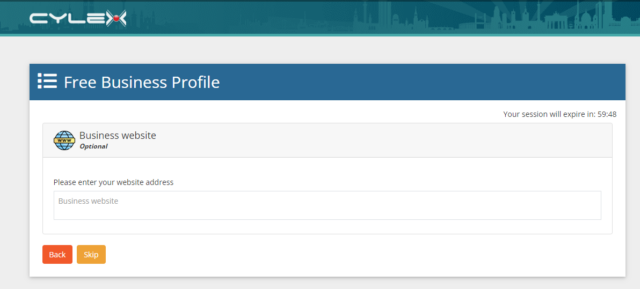
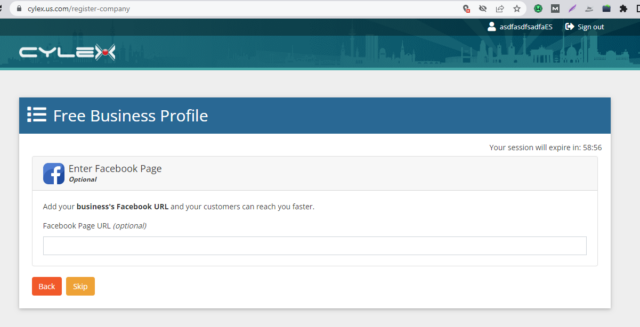
- A few next steps will require adding optional data – Website URL and Facebook page. You can skip them if you do not have those or do not wish to add them to your listing:
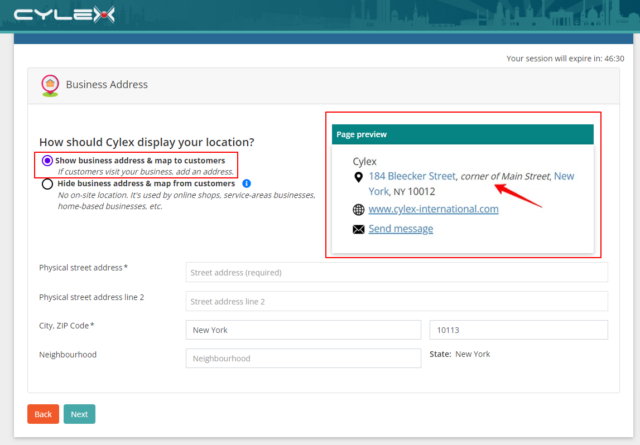
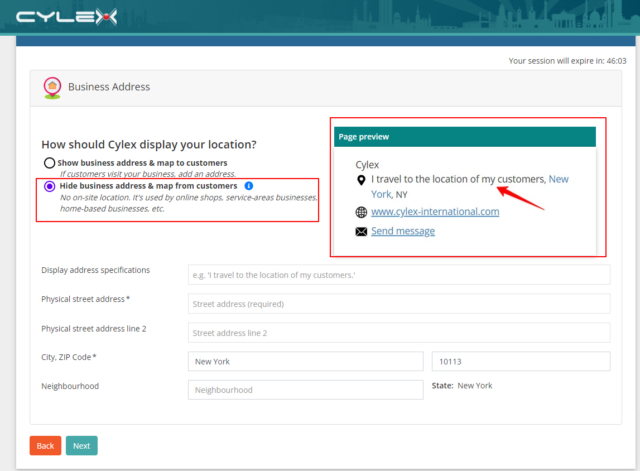
- Next, you must choose whether to display your full address on the listing or hide it. You still need to provide the full business address in both cases; however, switching between both options will show you the listing preview page on the right-hand side:
- Show business address & map to customers:
- Hide business address & map from customers:
- Show business address & map to customers:
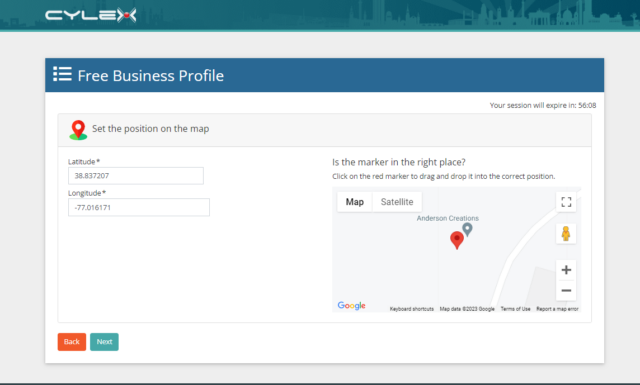
- Once you add your address, the next page will display the location’s coordinates. These are mandatory and are generated automatically, but if they are incorrect, you can amend them by dragging the map pin to the correct location:
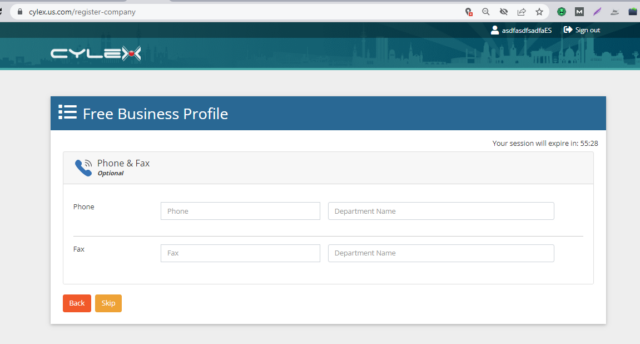
- Add your phone number (optional):
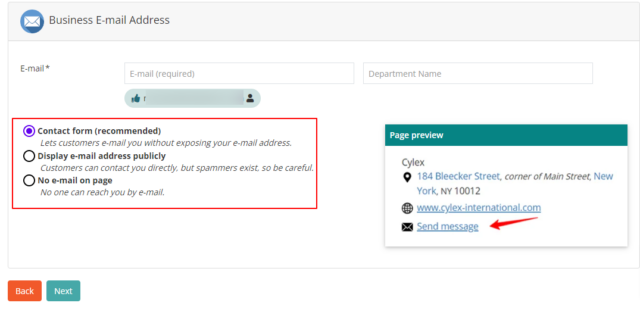
- Choose whether your business email is published on the listing or hidden:
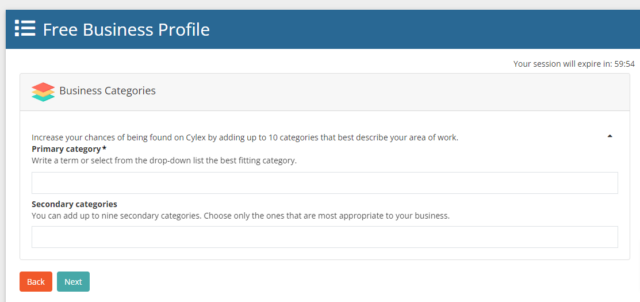
- Add primary and secondary business categories. Just start typing and select one from the available options:
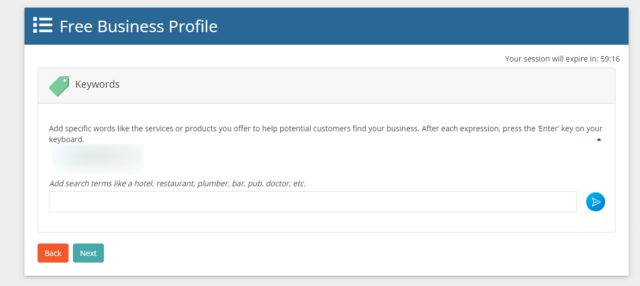
- Add keywords to your listing, like the services or products you offer (mandatory):
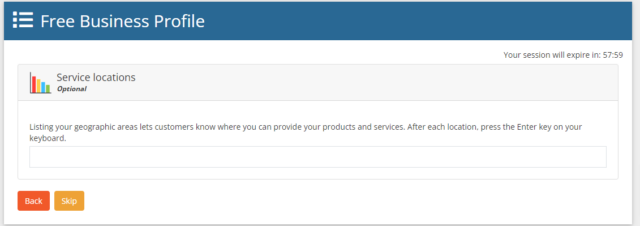
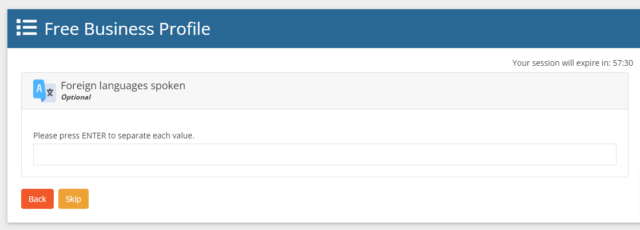
- Add areas you cover and languages spoken (optional):
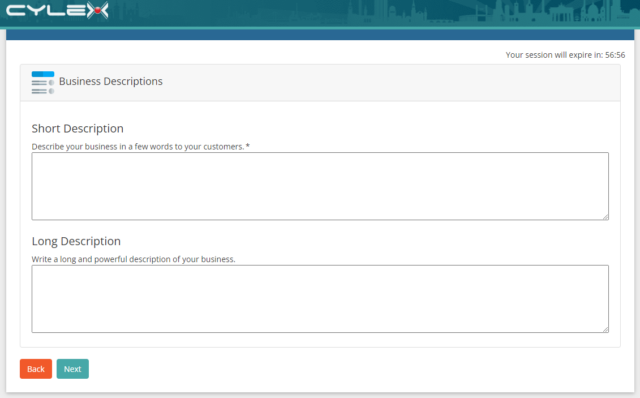
- Add business descriptions (short description is mandatory):
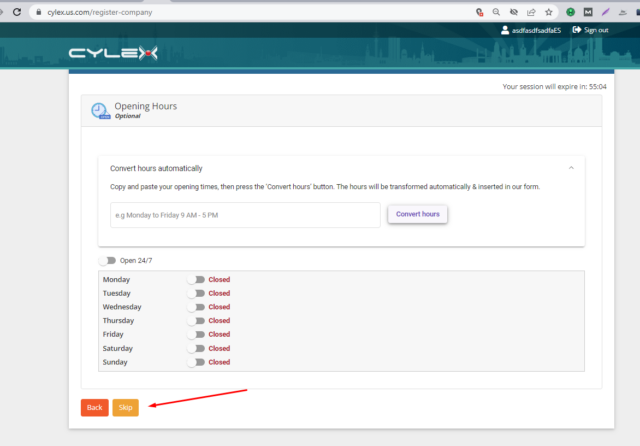
- Add opening hours:
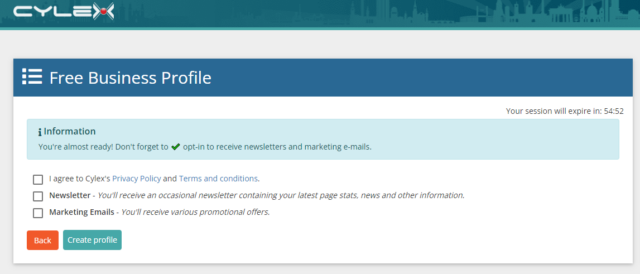
- Agree to the T&Cs and click “Create profile” to finish creating your business profile on Cylex:
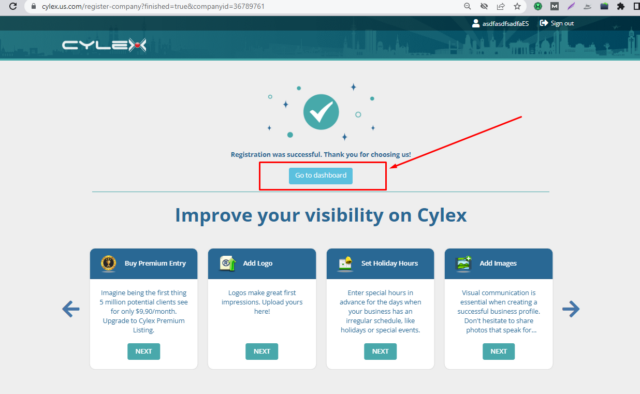
- Click “Go to dashboard” to see all other content you can add and manage:
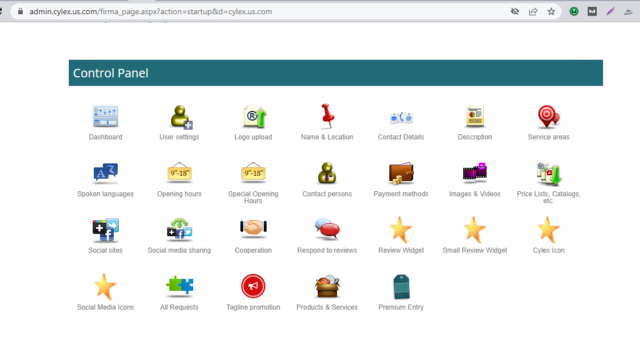
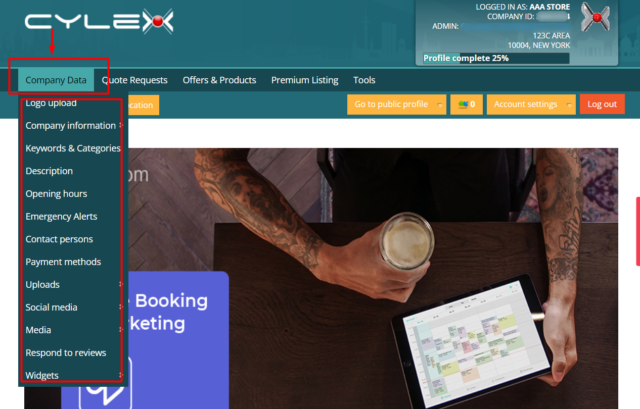
You can also navigate to this section from the main page (while logged in). Simply click on “Company Data” on the top left and under the drop down menu, select the section you need to update:
- Start with a zip code:
How to Claim an Existing Cylex Business Listing
-
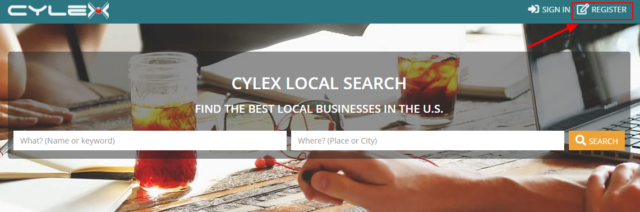
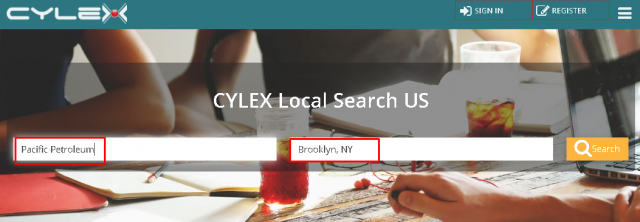
- Search for your business on Cylex. Open https://www.cylex.us.com/ or your regional equivalent, then enter your business name, city and state in the search fields. Next, click ‘Search’.
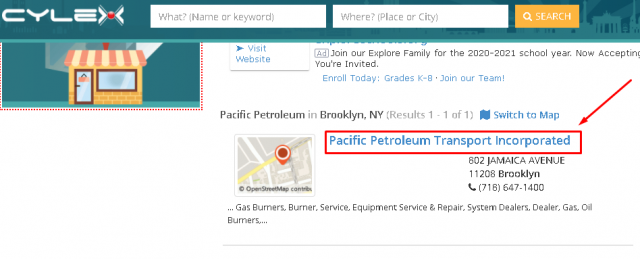
- If an existing listing is found for your business, click the business name.
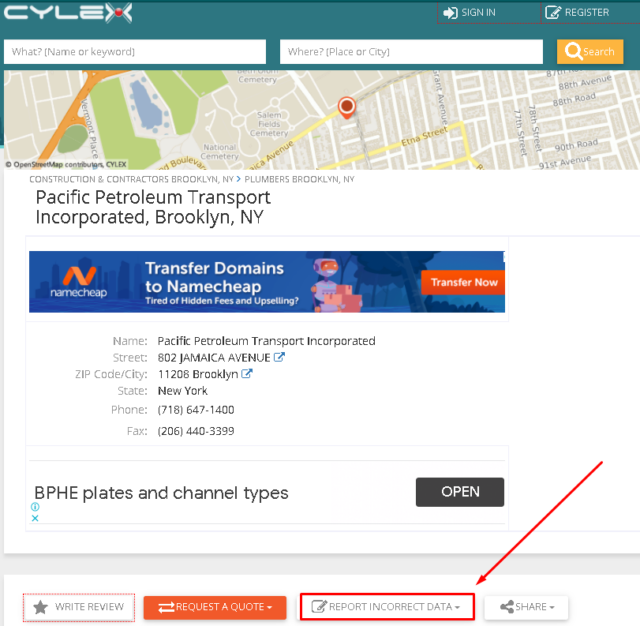
- On the profile page, click ‘Report Incorrect Data’.
- Search for your business on Cylex. Open https://www.cylex.us.com/ or your regional equivalent, then enter your business name, city and state in the search fields. Next, click ‘Search’.
-
- Select ‘Claim This Business’.

- Select ‘Claim This Business’.
-
- You’ll see options to claim your listing by Company Email, Website and an alternative email. Fill in the alternative email and click “ Send email”.
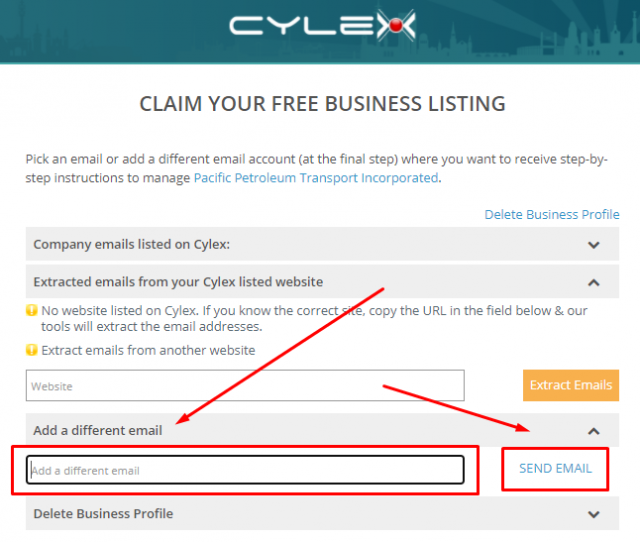
- You’ll see options to claim your listing by Company Email, Website and an alternative email. Fill in the alternative email and click “ Send email”.
-
- When prompted whether you can access the email account, click ‘Yes’.
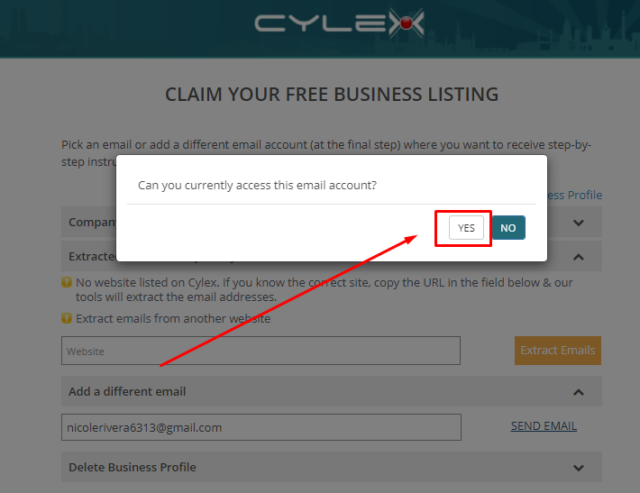
- When prompted whether you can access the email account, click ‘Yes’.
-
- You’ll receive an email letting you know that your claim submission was successful. Please bear in mind that this doesn’t yet mean that the claim itself was successful.
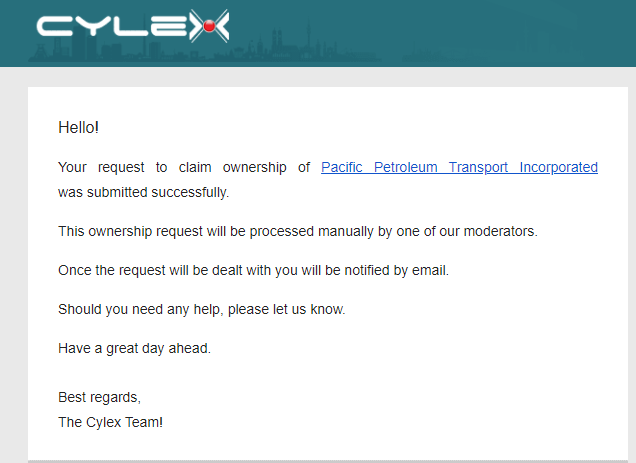
- You’ll receive an email letting you know that your claim submission was successful. Please bear in mind that this doesn’t yet mean that the claim itself was successful.
-
- Once approved, Cylex will send a confirmation message. Click on ‘Admin Link’ (which should take you here if you’re using the US directory). You can use this link to update your listing.
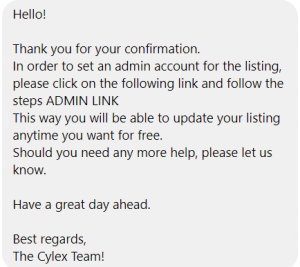
- Once approved, Cylex will send a confirmation message. Click on ‘Admin Link’ (which should take you here if you’re using the US directory). You can use this link to update your listing.
-
- Fill in the required details. Check the boxes below the form to confirm and agree with the terms and conditions, then click ‘Add User’.
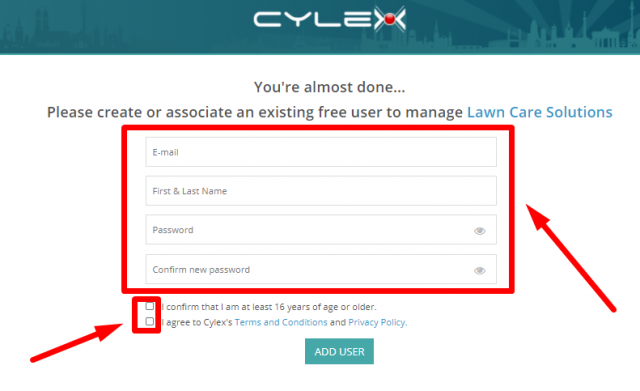
- Fill in the required details. Check the boxes below the form to confirm and agree with the terms and conditions, then click ‘Add User’.
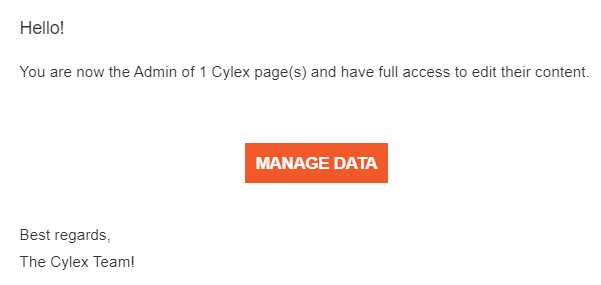
- You’ll receive an email verifying that you can now manage the listing.
If you have lots of citations to submit to Cylex or any other business directory, check out BrightLocal’s incredibly popular Citation Builder service, the pain-free way to get accurate listings set up or cleaned without the hassle of recurring fees.