


Since its inception in 2004, Zillow has become one of the best-known names in online Real Estate.
In 2020, more than 245 million users visited their website each month—making Zillow an essential website on which real estate businesses should be listed.
Below we take you through the steps to get your business and a listing added to Zillow. As always, leave any tips and tricks you may have for others in our comments section.
How to Add Your Business to Zillow
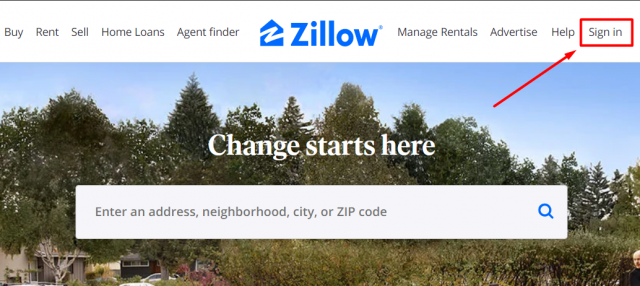
Step 1. The first step is to go to www.zillow.com and click on the ‘Sign In’ button on the top right:
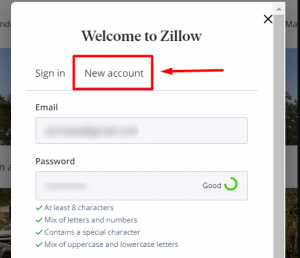
Step 2. Then click on ‘New account’ and fill in your details to register:
Step 3. Check the box that says ‘I am a landlord or industry professional’.
You’ll now see a dropdown menu with the following options:
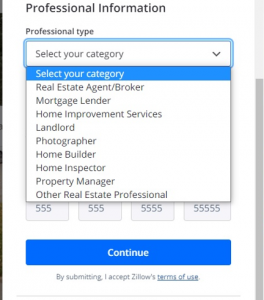
Select the applicable category and proceed to fill in the rest of the required information. Depending on the profile type you’ selected, you’ll see some or many data fields to complete.
We’ll run through an example showing the profile setup for a property manager, as this comes with the option to add listings for rental properties.
Select ‘Property Manager’, fill in all of the fields, and then hit ‘Continue’:
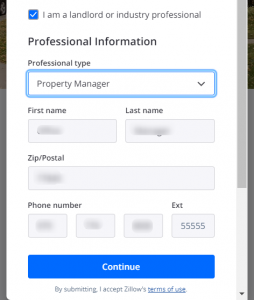
Step 4. The next page is for completing your profile information:

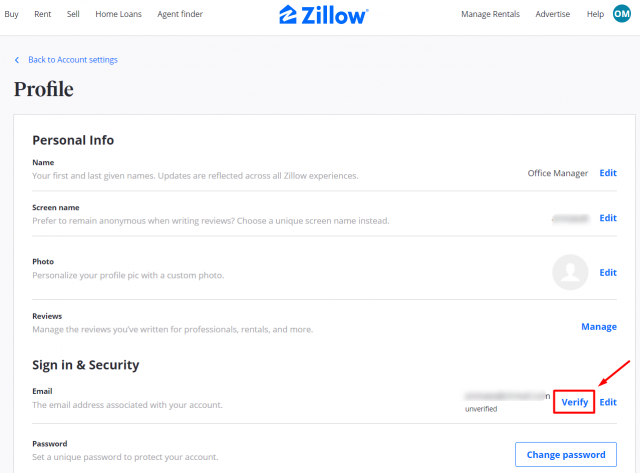
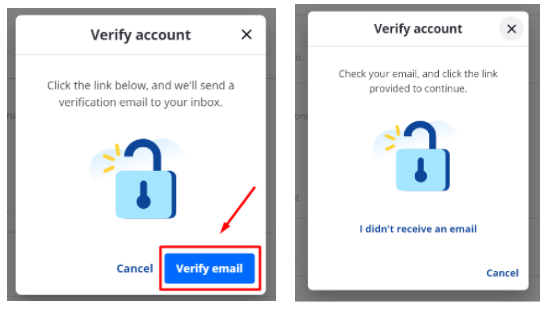
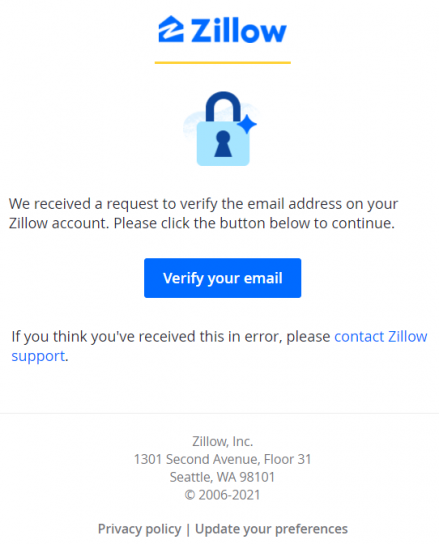
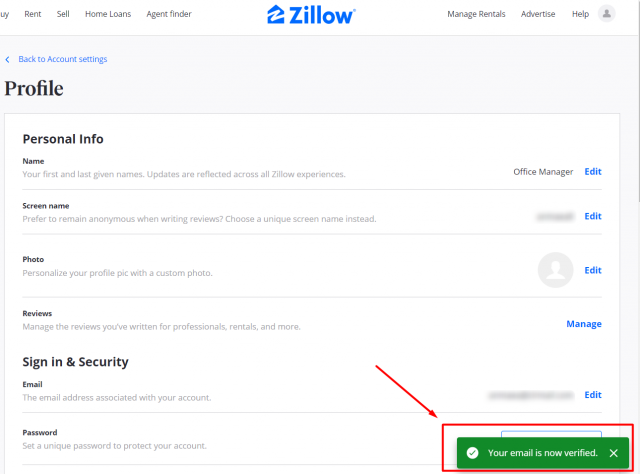
Step 5. Once your profile is completed and saved, you’ll need to verify your email address.
Within the ‘Sign-in & Security’ section, click ‘Verify’ (next to your email address) and follow the email verification steps:

How to Add a Zillow Property Listing
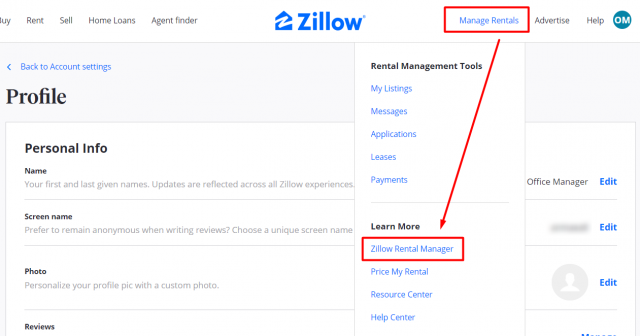
Step 6. Once your account is verified, click ‘Manage Rentals’, and navigate to the ‘Zillow Rental Manager’ section:
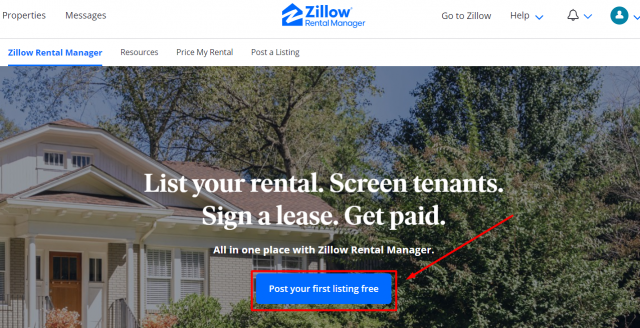
Step 7. Here you can hit ‘Post your first listing free’ to get started immediately, or save this link to come back to this later:
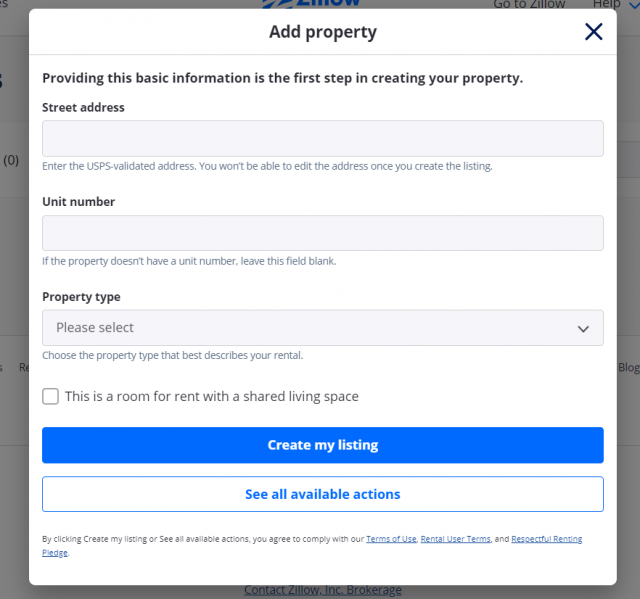
Step 8. Enter the address information for your new property listing:
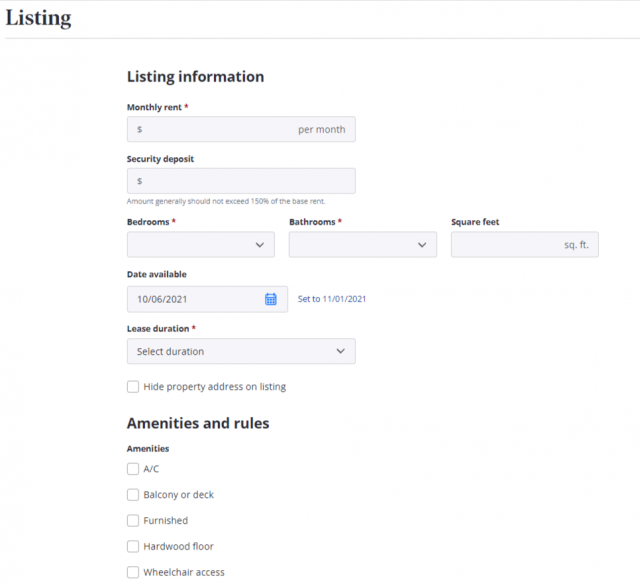
Step 9. Fill in the details with as much information as possible about the property:
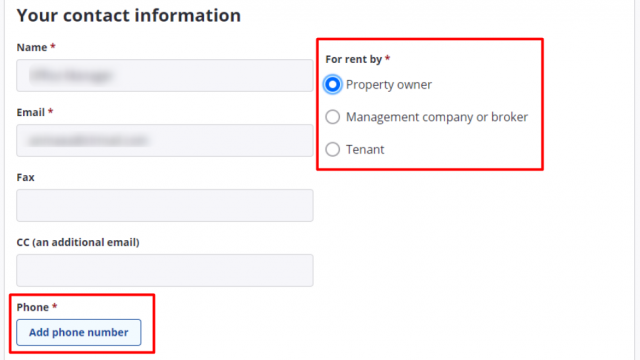
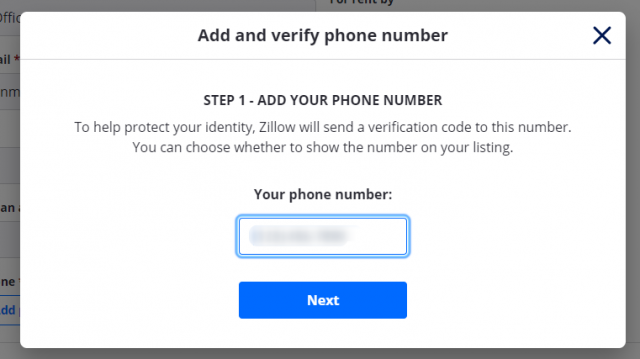
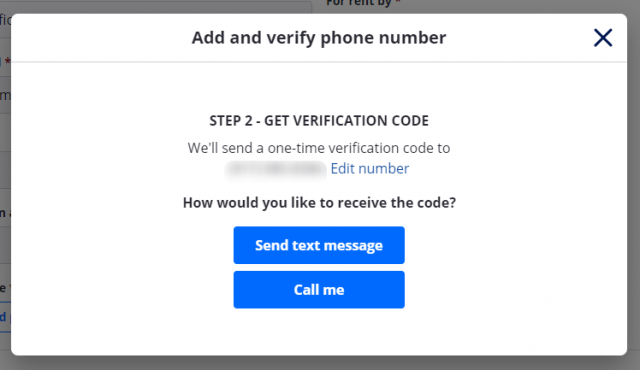
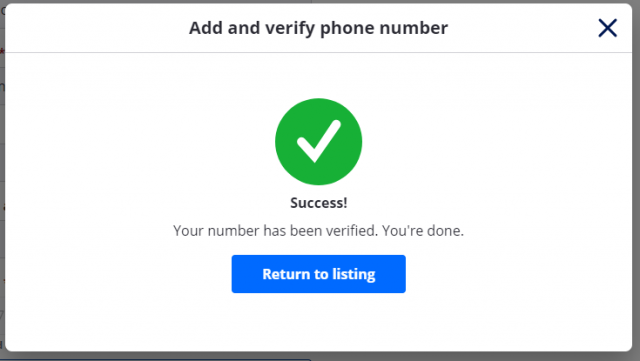
Step 10. Add a phone number and verify it by following the steps:
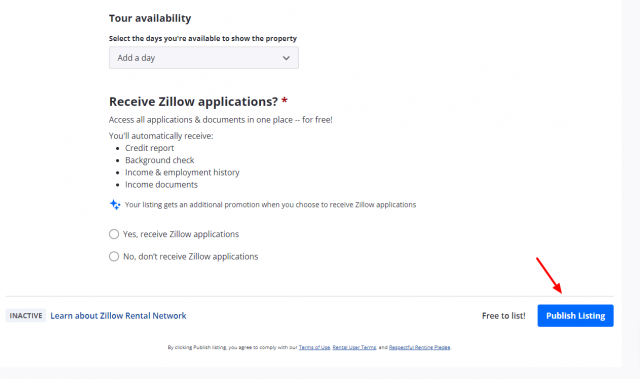
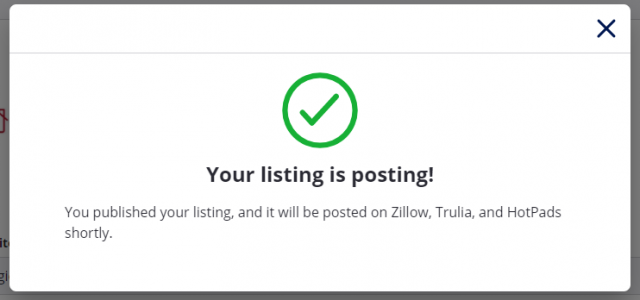
Step 11. After the phone number is verified, you can hit ‘Publish Listing’:
What if I’m not a ‘Property Manager’?
For other business categories, Steps 1-4 above will be pretty much the same.
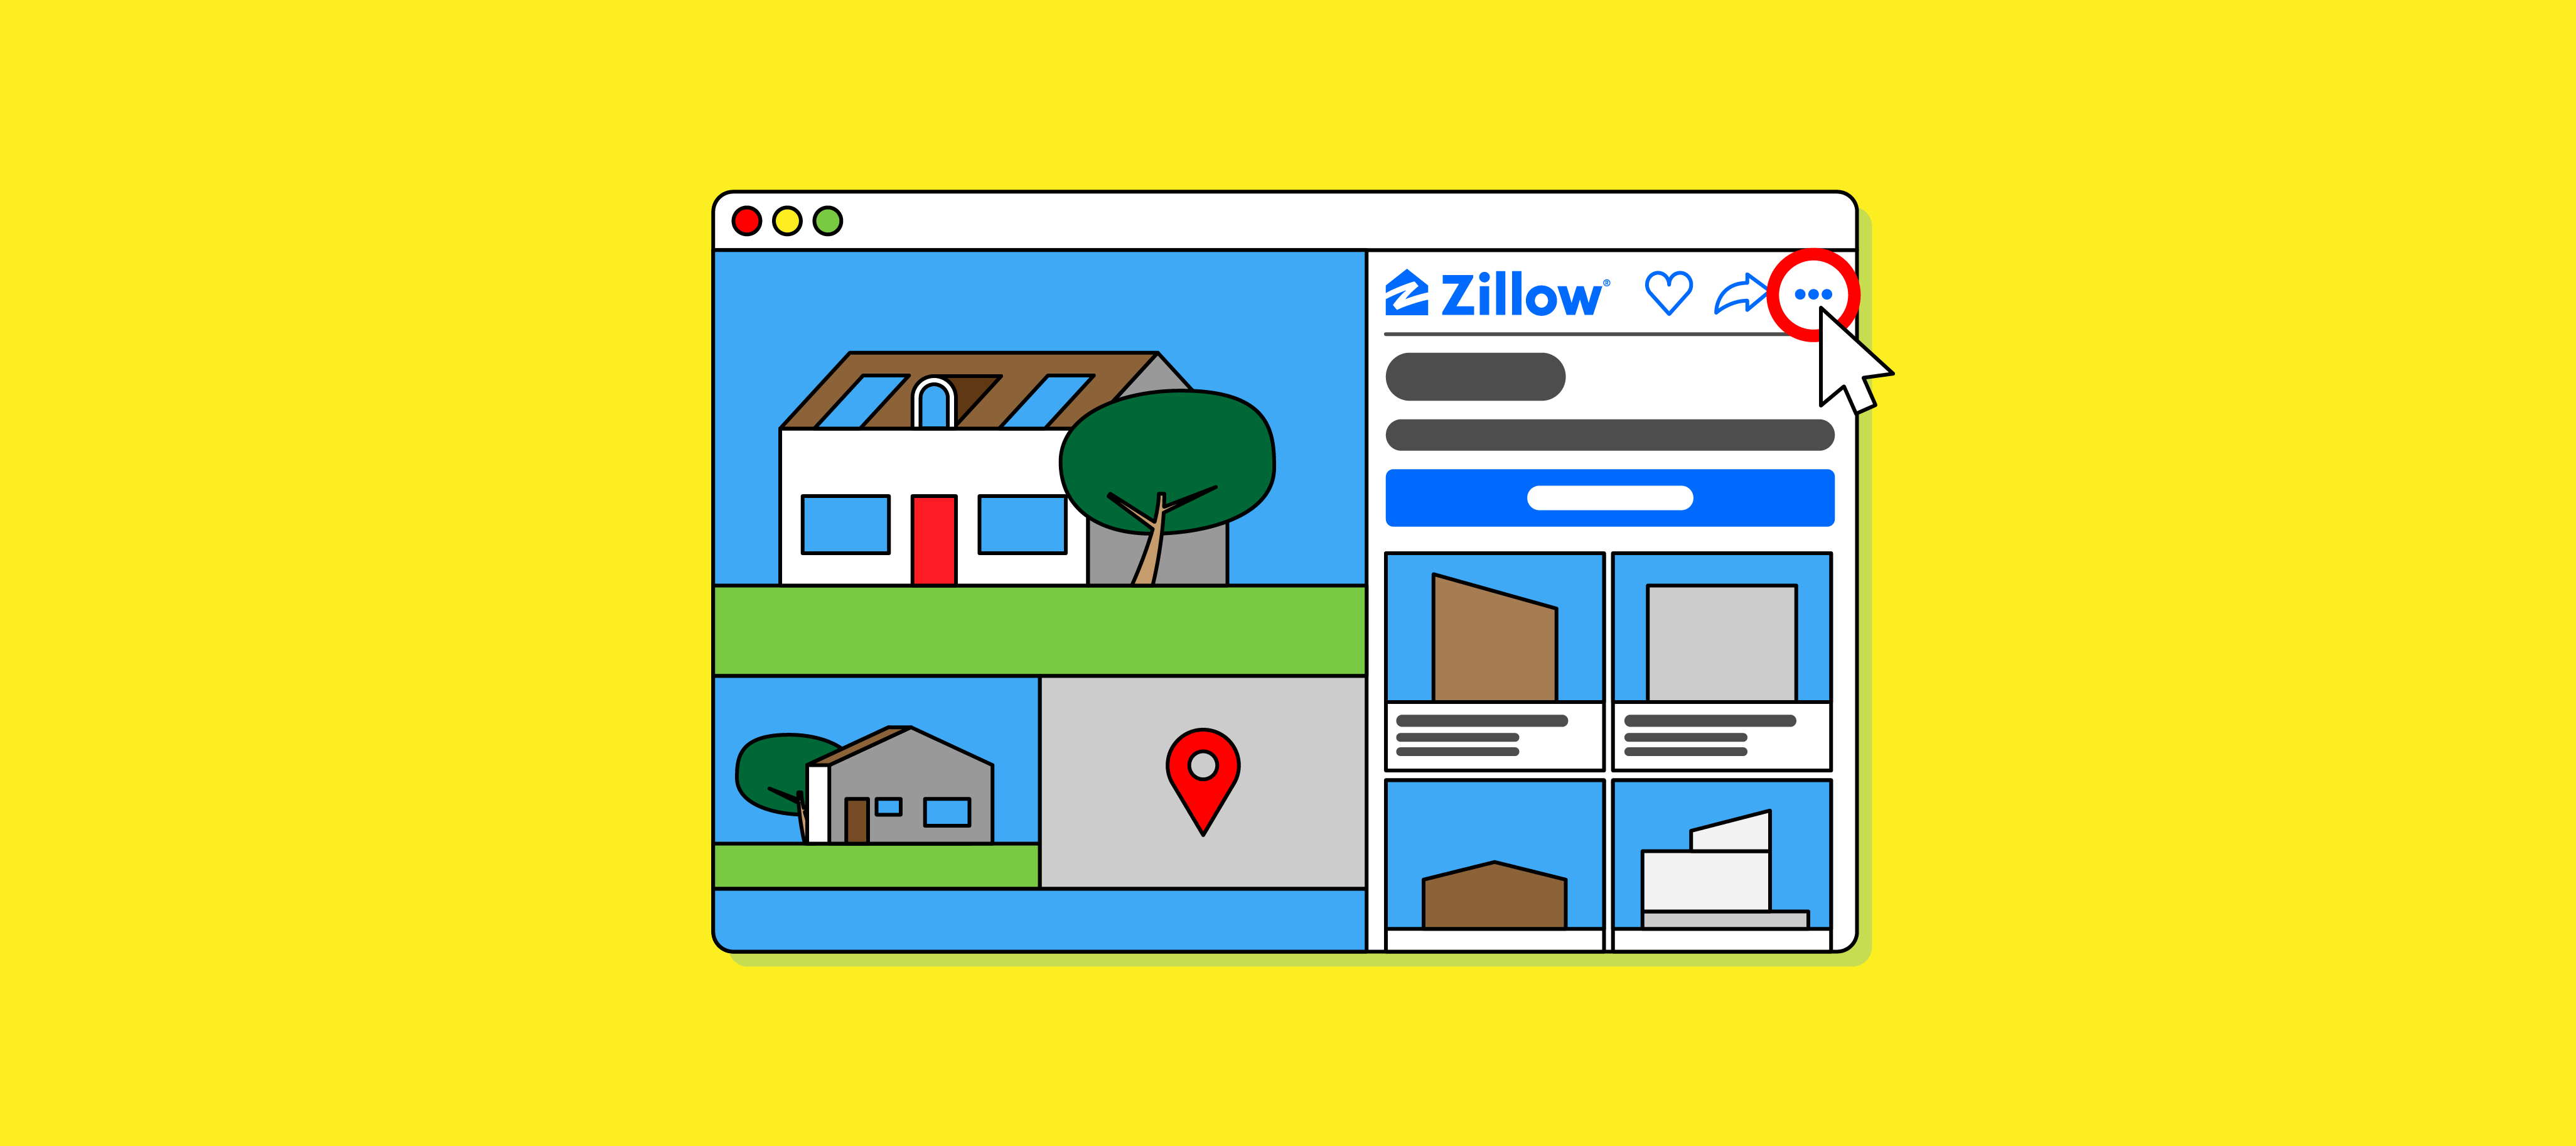
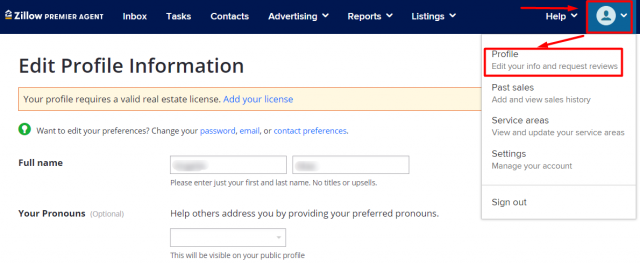
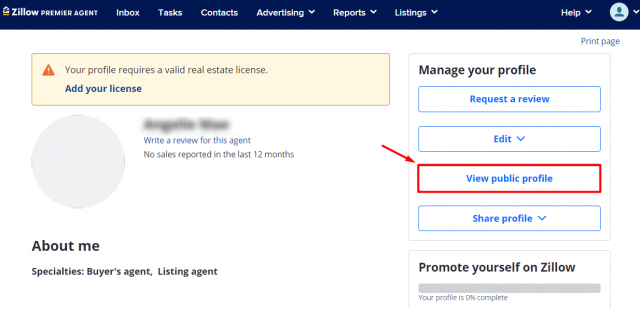
To view (and edit) your profile, you can go straight to this page, or click the icon shown on the upper-right side and then click ‘Profile’:
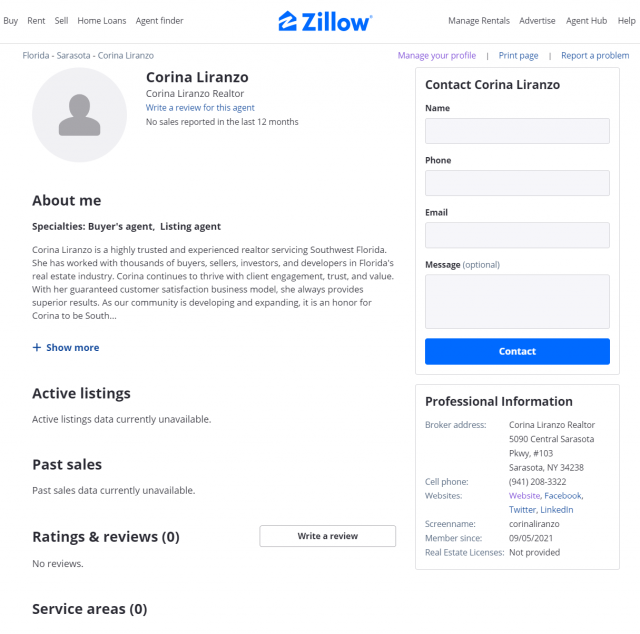
Here’s a sample of a Zillow public profile for a Real Estate Agent:
Your First Free Listing
All Zillow users are able to post their first listing for free—if you only have one property, you won’t have to pay to list it on Zillow Rental Manager!
Please note that:
- Each subsequent listing requires payment.
- Your first listing expires 30 days after the initial activation of your listing, or when you deactivate it.
- To prevent your first listing from expiring, you’ll need to reactivate it before it expires for an additional 30-day period.
- Reactivation of your first listing after it expires will require payment.
- Every rental listing after your first listing expires when you deactivate it.
- You won’t get charged for properties in your account that are not actively listed for rent.
Want to know more about Zillow pricing and costs? Get more information about Zillow pricing here.