


If you want to set up a Bing Places for Business listing, you can have your work cut out for you, especially if you’ve hundreds of locations to upload that aren’t on Google My Business. Even if you’re just adding or claiming one business on Bing Places business, the process can get complex.
That’s why I’ve put together this step-by-step guide on how to add and claim a business on Bing Places. Follow these steps and you’ll see your business’ pin on Bing Maps in no time.
Before you begin, though, I’d recommend setting up a Microsoft account. It’s not mandatory to work with Bing Places, but it makes the process a lot smoother.
Whether you’re just adding a single business to Bing Places or you’re managing a large chain which needs to build 100s of listings on Bing Places, you can just click below to head straight to the process that’s right for you.
- How to Add or Claim a Business on Bing Places for Business (SMBs: 1-10 Locations)
- How to Add a Business on Bing Places for Business (Large Businesses: 10+ Locations)
- Import business data from Google My Business
- Manual upload (set up an HQ in Bing Places for Business and bulk upload business location data)
How to Add or Claim a Business on Bing Places for Business (SMBs)
Bing Places has different processes for different sizes of business, based on the number of locations that business has. If your business has 1-10 locations, this is the process you’ll want to use to add or claim a business on Bing.
Step 1. Log in to your Bing Places for Business Account.
Step 2. Go to the Business Search page. Select the business type (number of locations) and the country the business operates in search. Then search for your business using the phone number or a combination of the business name and the location.

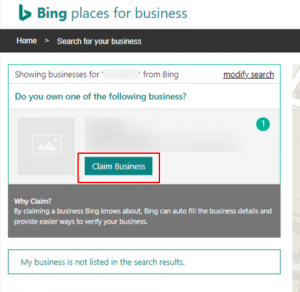
Step 3a. If your business has been added to Bing Places, it will appear in the search results. Once you see it, simply click ‘Claim Business’, which will redirect you to the location dashboard.
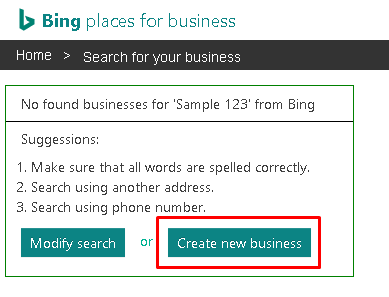
Step 3b. If you’re adding a brand new business not currently listed on Bing Places, you’ll want to click ‘Create New Business’. The process from this point on is the same for creating and claiming a business listing.
Step 4. Within the location dashboard, you will see the NAP details currently published on Bing. Unfortunately, at this stage, you won’t be able to change them until verification is completed. Click “Next”, to proceed to the next steps, where you can edit and/or add more rich data to your listing. (Note: Bing Places does not allow PO BOX addresses)
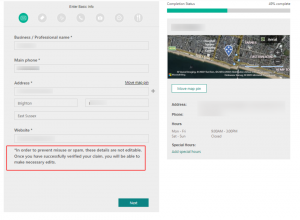
Step 5. To specify a location on the map, click ‘Move map pin’, move the pin to the center of your business’ area, then click ‘Submit’.

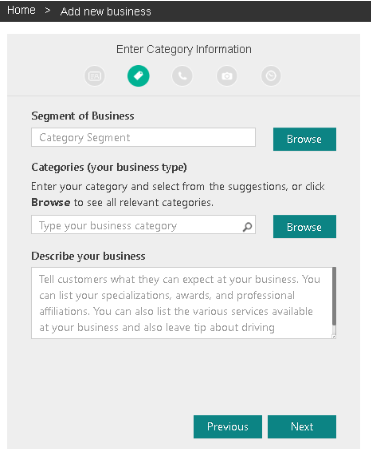
Step 6. Enter your business category (you’ll need to select from one of Bing’s presets) and write your bespoke business description.
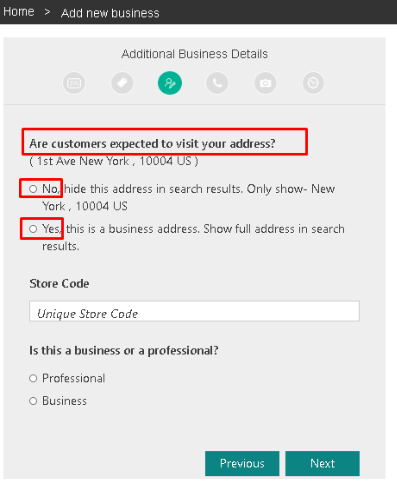
Step 7. Choose to show or hide your full business address. Just as in Google My Business, you should only show your full address if customers can expect to visit you at this address. If you don’t have a business address, select ‘No’.
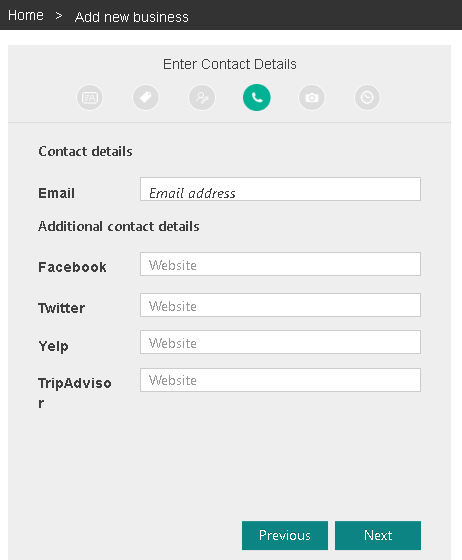
Step 8. Enter your business’ contact details and links to relevant social media profiles, such as Facebook, Twitter, Yelp, and TripAdvisor.
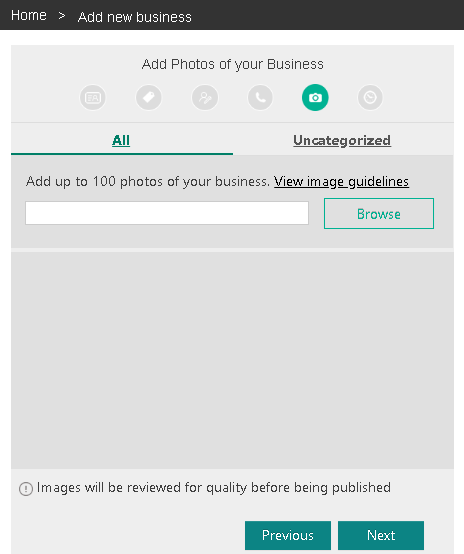
Step 9. Add photographs of your business to your listing. Click ‘Browse’ to select the photos you’d like to upload. (Note: the first photo you upload will appear as the main image on your listing, so we’d recommend choosing a company logo.)
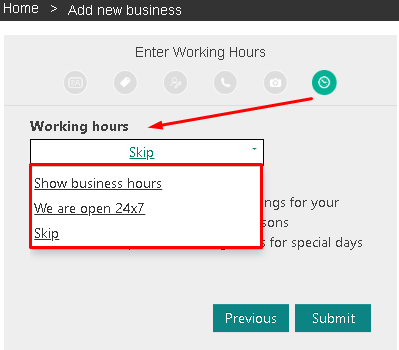
Step 10. Next, set your working hours, if applicable. Click ‘Skip’ to proceed without setting business hours.
Step 11. The final step is to verify the business on Bing. You can verify the business listing right away or do it at a later date. For verification, you will see available several options, which can include phone, website, email and post. There is no way to specify which will be available to you.

Select your preferred verification method and follow the instructions on the screen. For some businesses, email verification is available. In this case, Bing will auto-populate the domain part of what it thinks your business email should be (email domain should match the business URL domain). You won’t be able to change this and can only enter the first part of your business email. If Bing guessed the email domain incorrectly, you will need to choose another verification method.
Postcards may take 5-6 business days to reach the business address listed. You can also verify via the Bing Places app (Apple App Store / Google Play)
Step 12. Once you verify the business listing on Bing, it will go through a 7-14 day publishing cycle, after which all changes will become visible on Bing Maps and in Bing’s local search results.
How to Add a Business on Bing Places for Business (Large Businesses: 10+ Locations)
If you’re looking to add and manage a business with more than 10 locations (what Bing Places calls a ‘chain’) you’ll need to either import data from an existing Google My Business account or manually set up an HQ in Bing Places and bulk upload location data from a spreadsheet.
How to import multi-location business data from Google My Business to Bing Places for Business
Step 1. Log in to your Bing Places for Business Account.
Step 2. Go to the Business Search page. Select the business type (number of locations) and the country the business operates in search. Then search for your business using the phone number or a combination of the business name and the location.
Step 3. Select ‘Import from Google My Business now’.

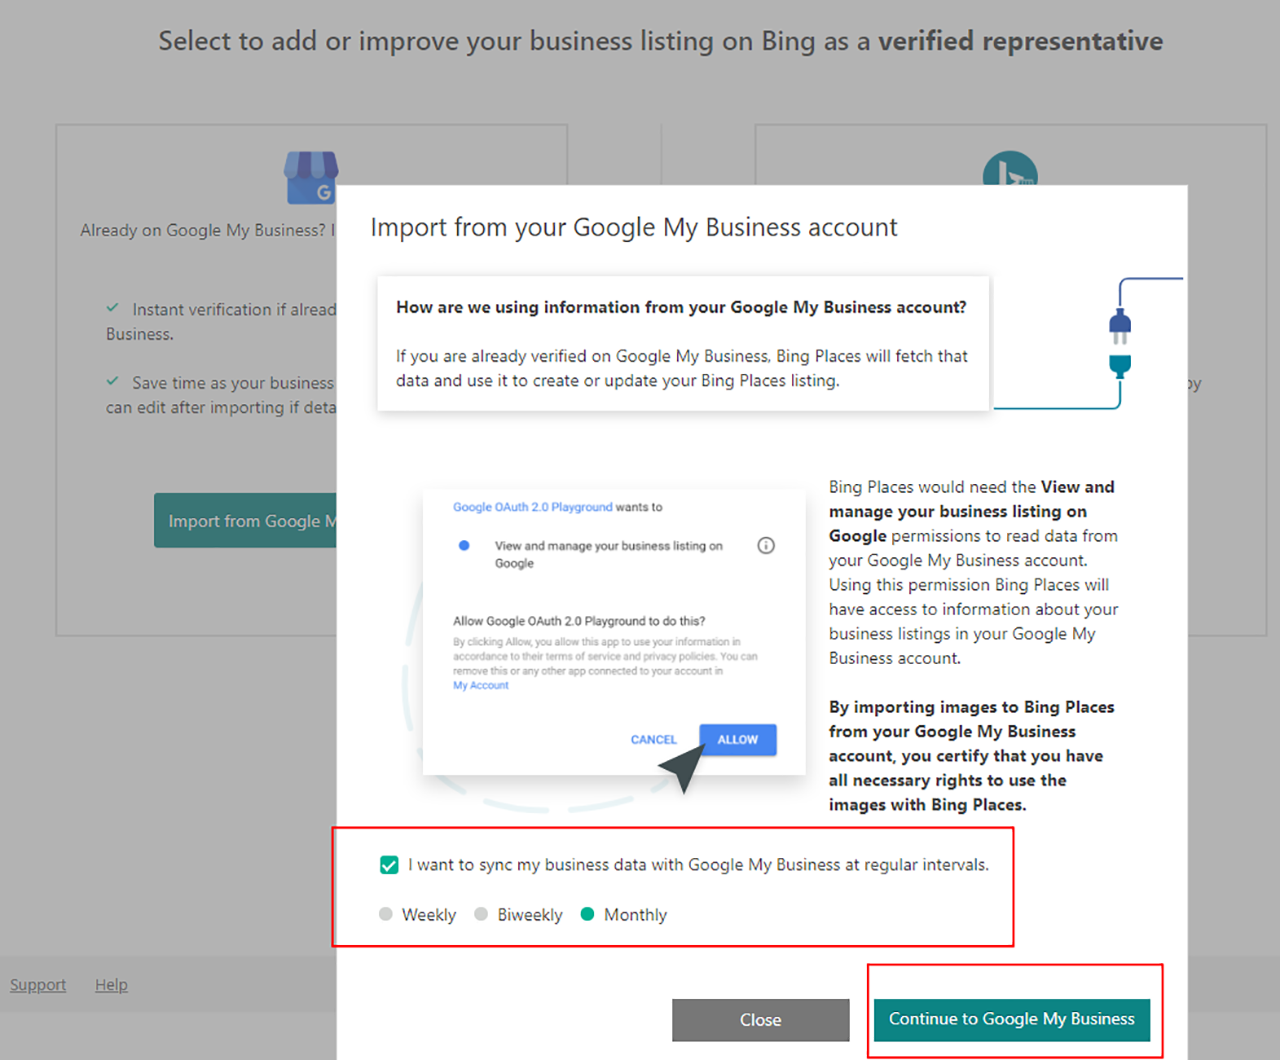
Step 4. On the popup that explains the import process further, select whether you want to sync data with Google My Business at regular intervals, and if so, how frequently (Weekly / Biweekly / Monthly). Then click ‘Continue to Google My Business’.
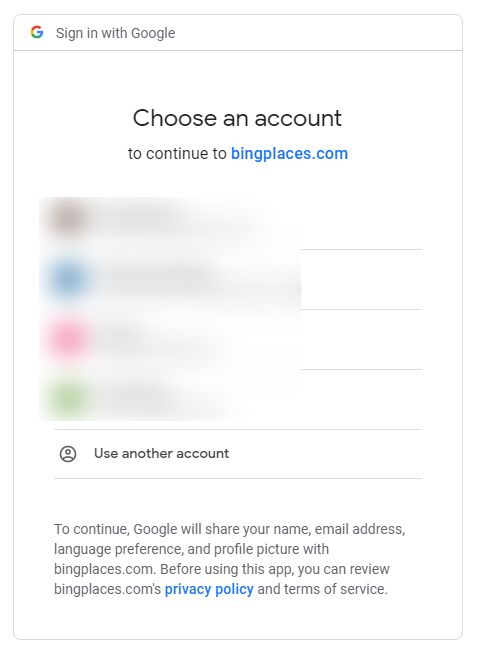
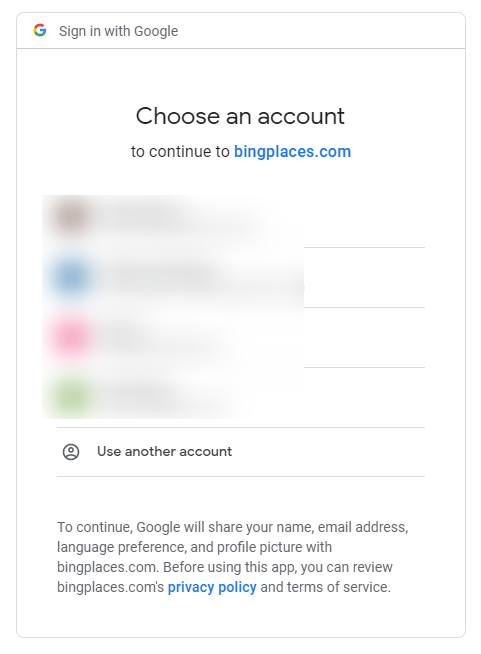
Step 5. Choose the Google My Business account you wish to connect to Bing.
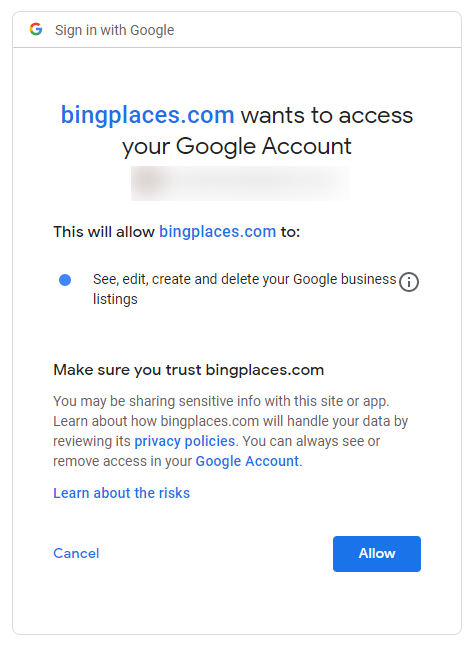
Step 6. Confirm the connection with Bing.
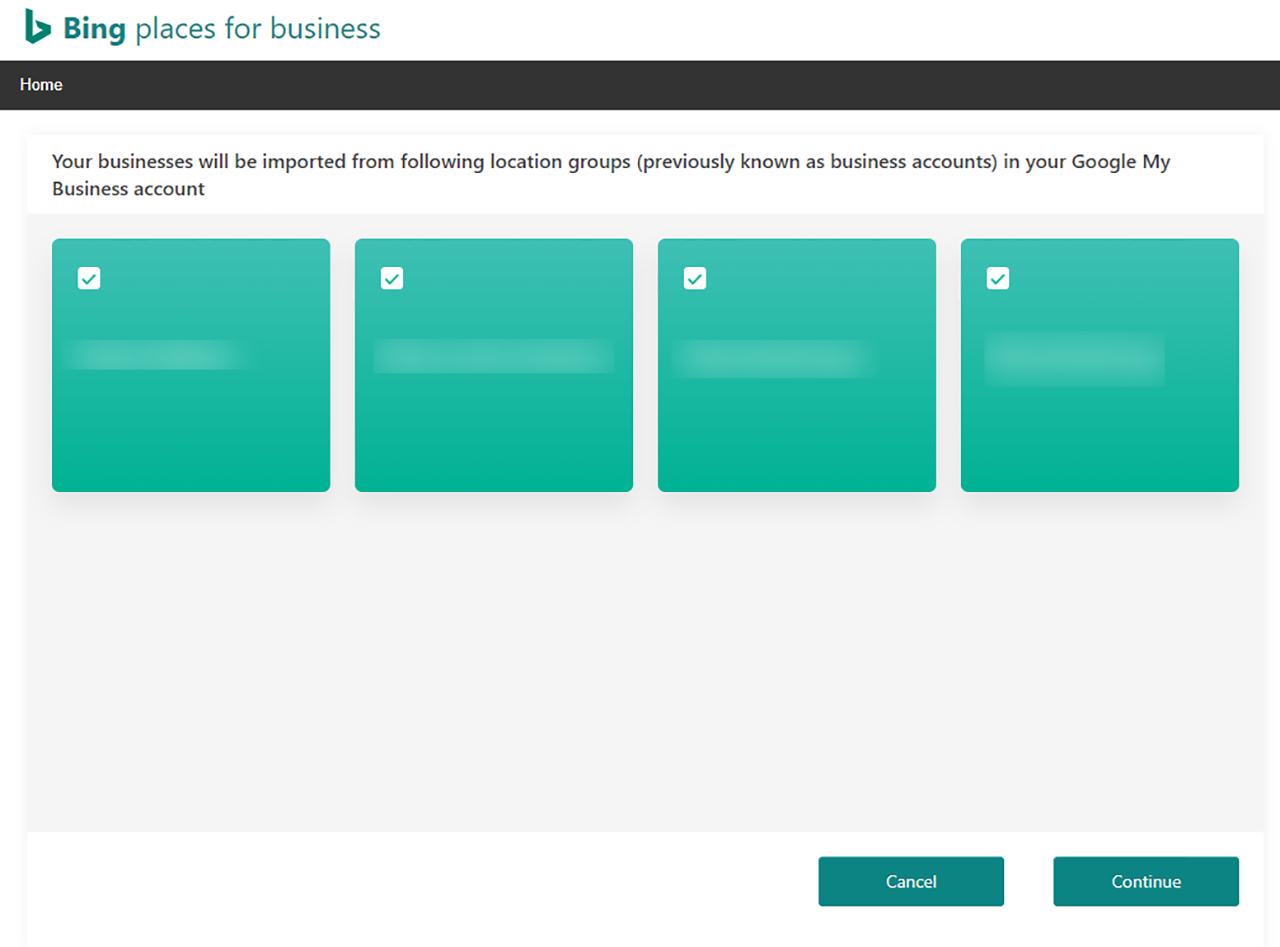
Step 7. Finally, you’ll see the list of businesses that are in your Google My Business dashboard. Here you can select which ones you want to import by checking the box with the business name.
This process will bypass the Bing Places for Business verification stage, provided that your Google My Business listings are verified.
How to manually upload multi-location business data to Bing Places for Business, by setting up an HQ and uploading data via a spreadsheet.
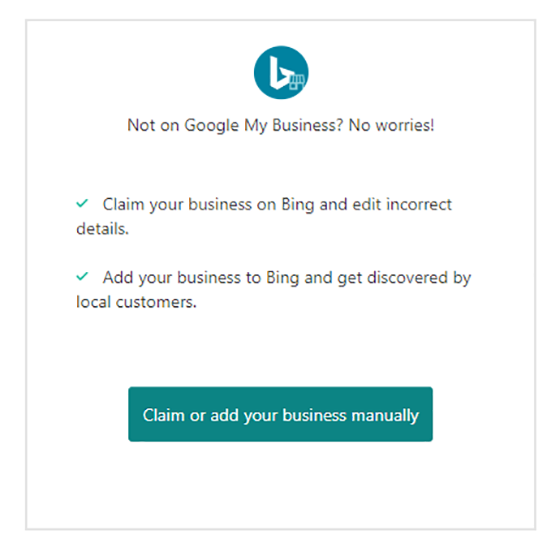
Step 1. Head to your Bing Places for Business account.
Step 2. Select ‘Claim or add your business manually’.
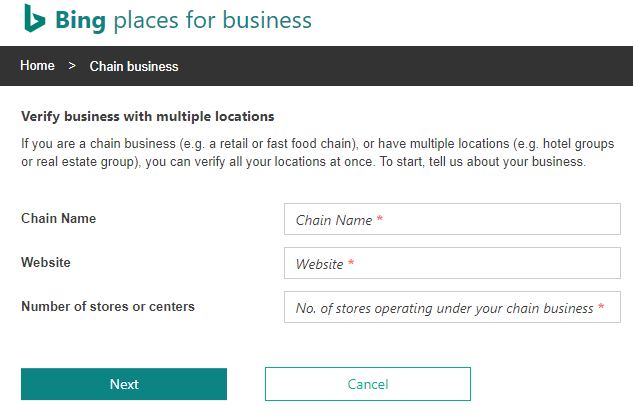
Step 3. Next you’ll need to register your chain and set up your HQ. Enter your contact information and select ‘Register a chain business’.

Step 4. Fill in the information about your chain, including name, website and the number of stores or centers.
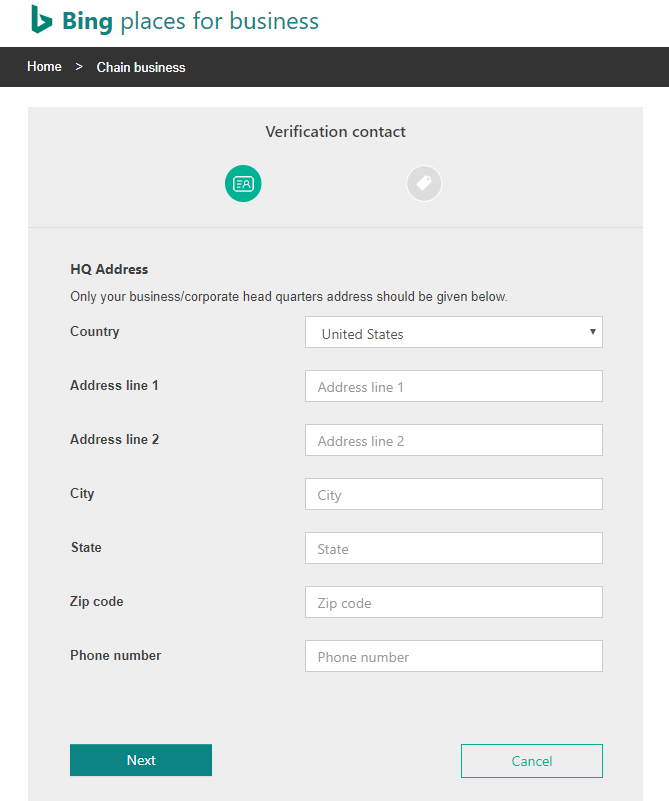
Step 5. Fill in the details about your corporate HQ. This is where the verification request will be sent before you upload your location data.
Step 6. Confirm that the details you’ve submitted are correct and click ‘Submit’.
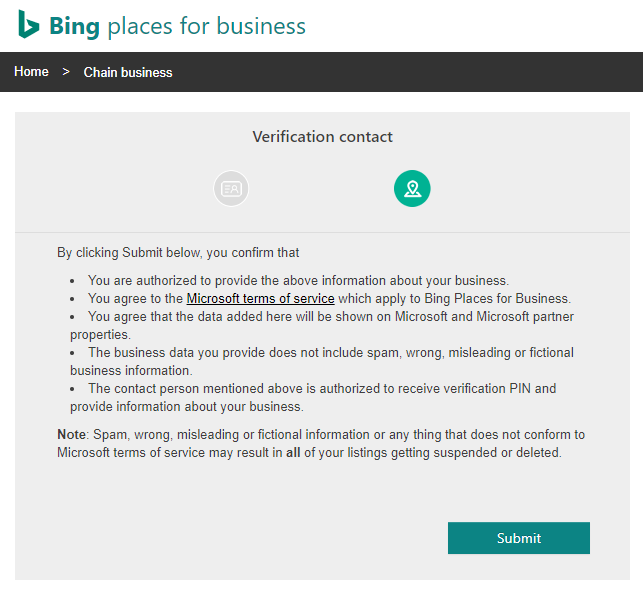
Step 7. Next you’ll need to verify the chain’s headquarters. Normally two options will be available here: email verification or the usual option to mail the postcard to the business address.
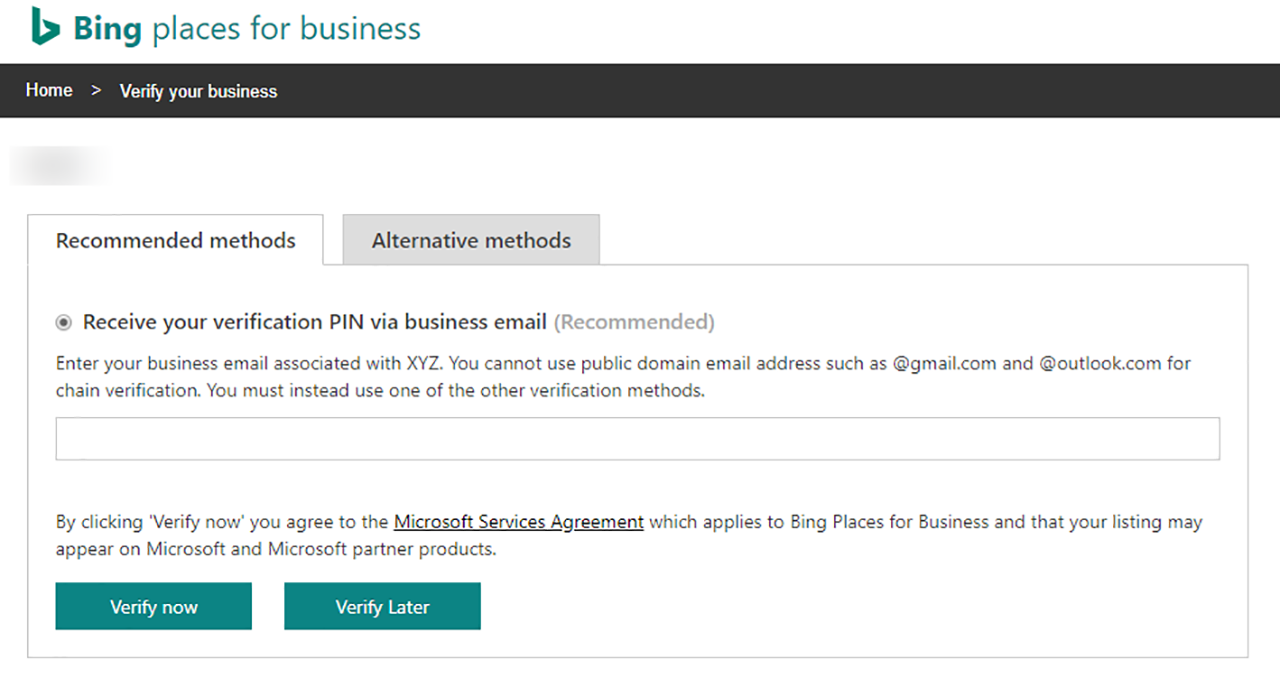
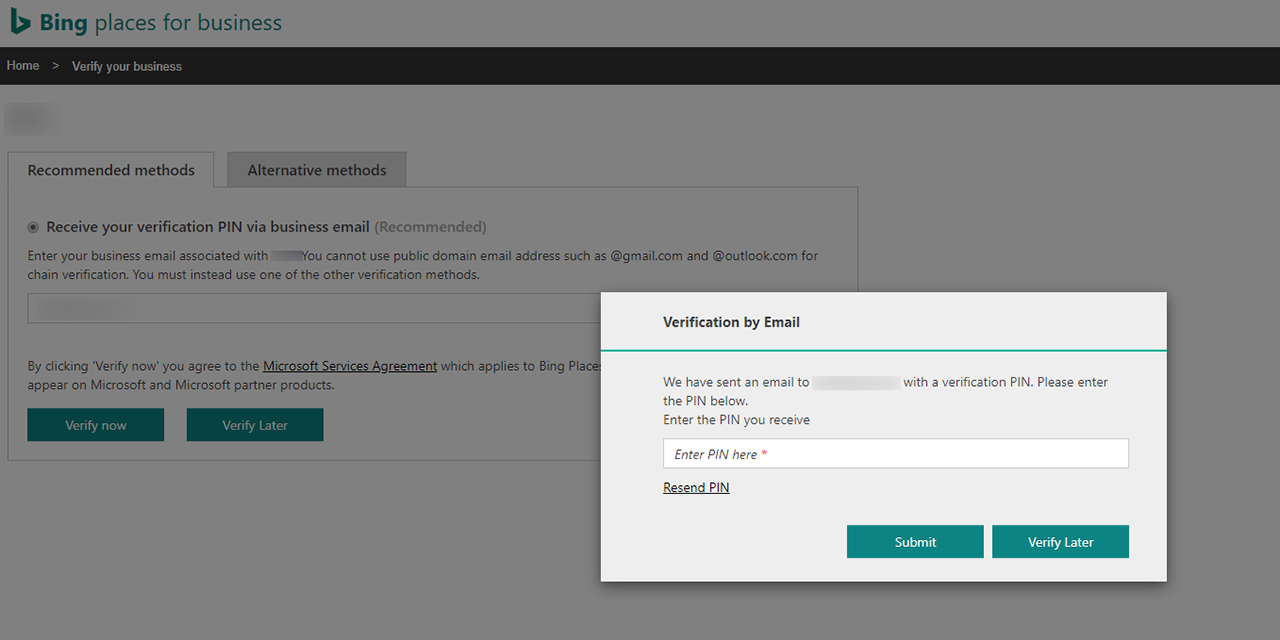
The easiest and quickest way to get your headquarters verified in Bing Places for Business is to verify via email, as you will receive the verification PIN instantly. You just need to enter the email address (which must match the business website domain) and click ‘Verify Now’.
If the email address is approved, you’ll get a pop up asking to enter the PIN. Check your inbox and enter the PIN here:
The second option allows you to request for the verification PIN to be mailed to the HQ address you entered earlier in this process.
You can always request another PIN or verify later. If you choose to verify later, you’ll be prompted to enter your PIN each time you log in to your Bing Places for Business dashboard.
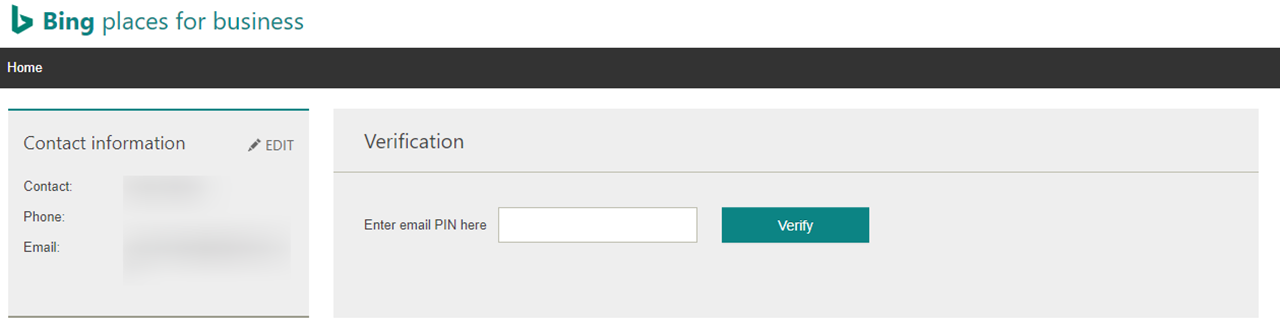
Once you enter the correct PIN, the account will be reviewed and verified, meaning you’ll be able to move on to uploading the data about all your locations in bulk.
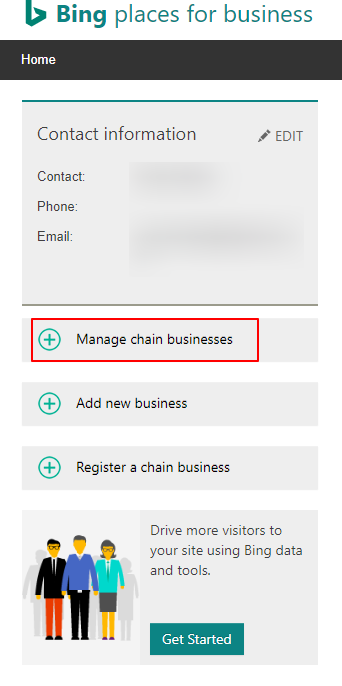
Step 8. Head to your Bing Places for Business dashboard and click ‘Manage chain business’.
Step 9. You’ll need to fill out the location data (for up to 10,000 listings) using an Excel template preferred by Bing Places for Business. Click ‘bulk upload template’ or ‘Download template’ to download the template.

Step 10. The template contains examples of how to fill it in, so provided you have access to all the relevant data it should be easy (though fairly time-consuming) to complete.
Once you’ve filled it in, save the file, select it with ‘Browse’, then click ‘Upload’ to upload the selected file.
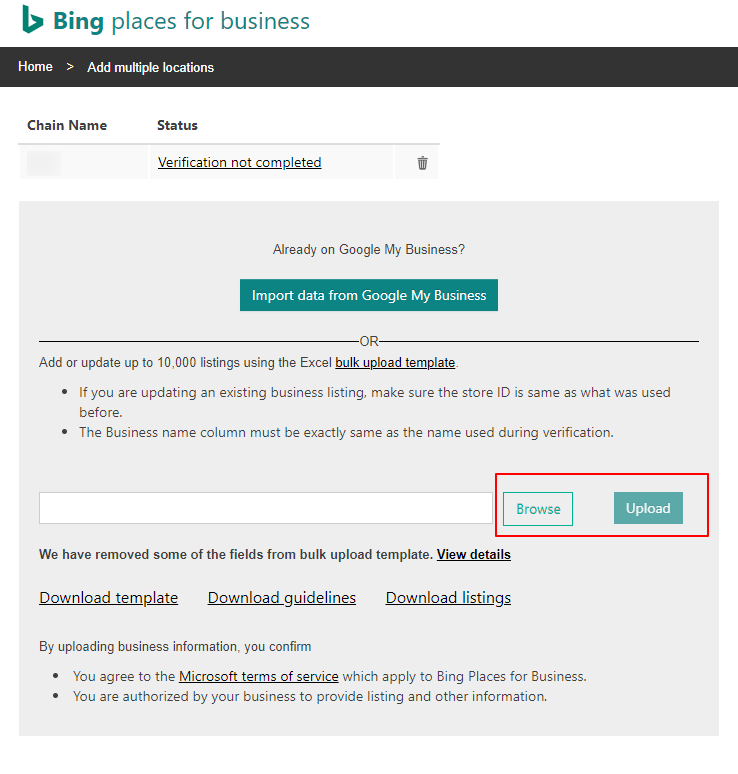
Step 11. Check that the uploaded information is accurate. If some of the data had errors, the file won’t upload and instead you will get an error message. You will have the option to download a file which highlights these errors. All you’ll need to do is correct them and re-upload the file again.
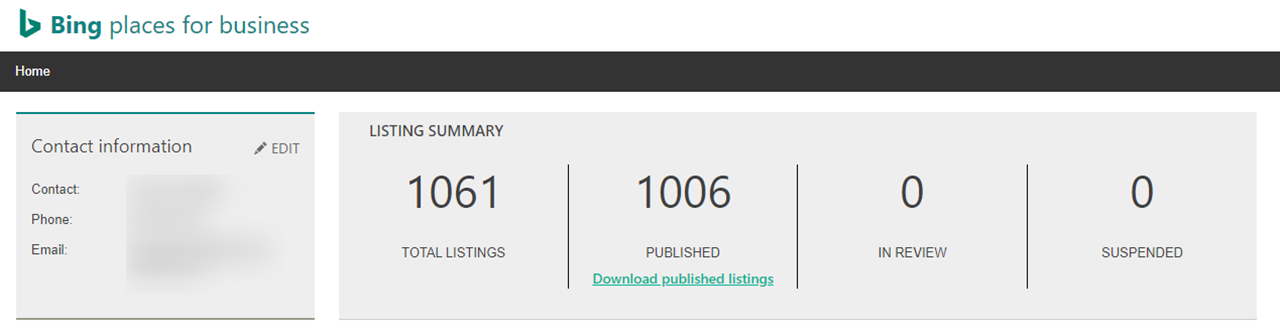
Once all locations have been added, they will be claimed automatically and will go through a verification cycle. They will be marked as “Verified”, and once they go live (within one to two weeks) they will be marked as “Published”.
The summary and status of your listings will be shown on the main dashboard:
If you ever need to add a new location, you can simply go through the steps to update the locations file. Download the file, add the new location information to the template upload the file again. This way you will not need to worry about verifying the branch separately.
Remember, you can manage several chain businesses within one account, but you will need to register each one separately.