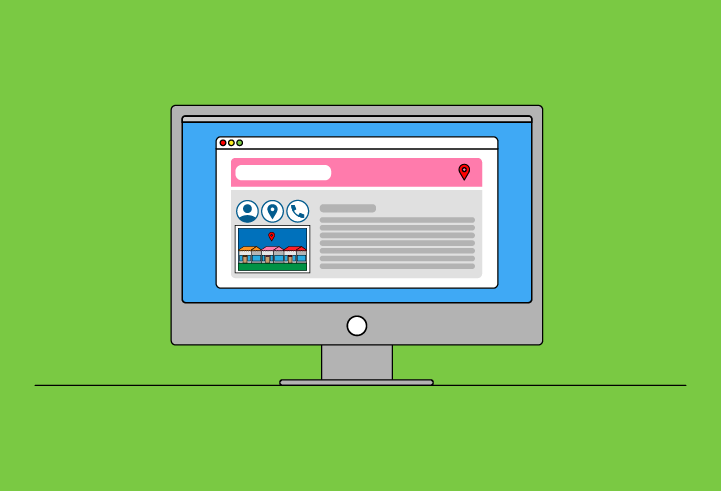


According to Meta, 1 billion users use Facebook’s platforms to message a business every week—so, while that also includes apps like Instagram and WhatsApp, there’s no denying the significance of a stat like that!
With all the developments that have taken place in recent years, including the switch from Facebook Business Manager to Meta Business Suite, new page designs, and changes to the ways you can manage your locations, you’d be forgiven if you’re not sure where to start!
We’ve broken down the steps for:
- Creating a new Facebook Business Page as a single business.
- Creating and managing multiple Facebook Business Pages.
- Requesting access to claimed pages.
Creating a New Facebook Business Page (Single Business)
Step 1. Log on and create a page
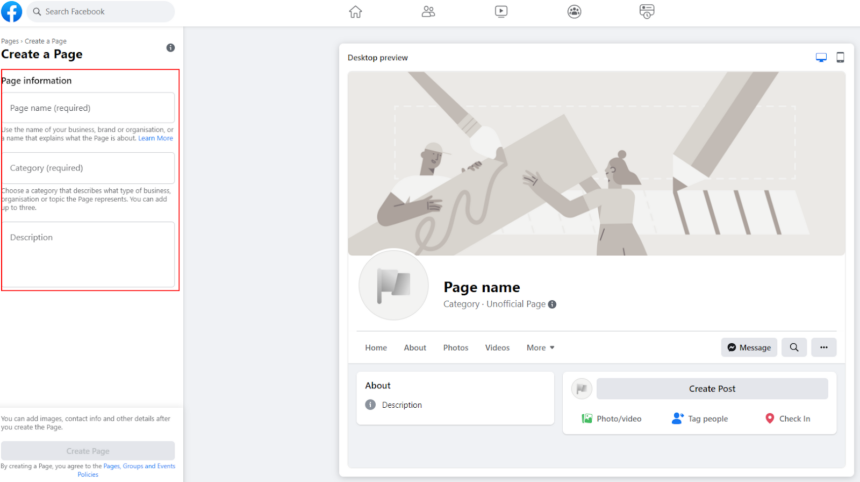
- Log in to your Facebook account and then go to https://www.facebook.com/pages/creation.
- The center of the page will show you the preview of the page you are about to create—this preview updates in real time as you move through the steps and add the required information. You can switch between desktop and mobile view by clicking on the relevant icons in the top right corner.
Step 2. Begin adding your business information
- On the left side of the page, you will see the fields with required and optional business information. To proceed further, you must add at least the required information. However, the more content you add, the better.
- The first step is to add a page name (your official business/brand name), business category (you must select an option from the suggested drop-down menu), and business description (this is optional and can be added later).
Step 3. Add your business logo
- After entering this information, click the “Create Page” button.
- You will see a couple of new fields appear on the left menu, allowing you to add the logo and a profile picture (again, this is optional and can be added later), as well as toggles to switch notifications and promotional emails on or off. Once you’re done, click “Save.”
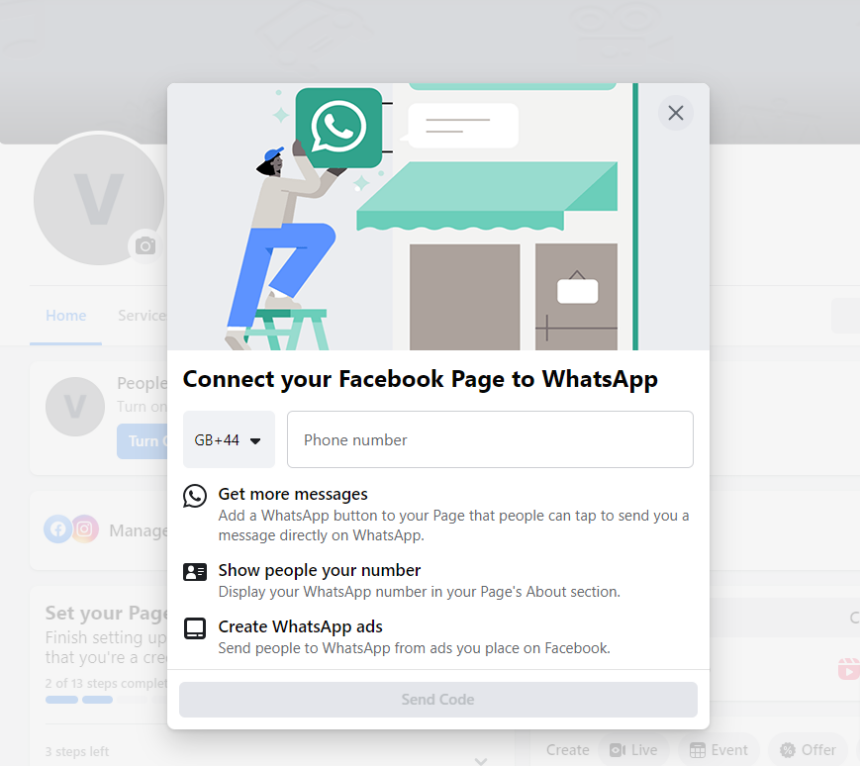
Step 4. Connecting to WhatsApp
- You will be given the option to connect your page to WhatsApp by adding your mobile number. This is optional: if you do not want to do this, simply close the pop-up.
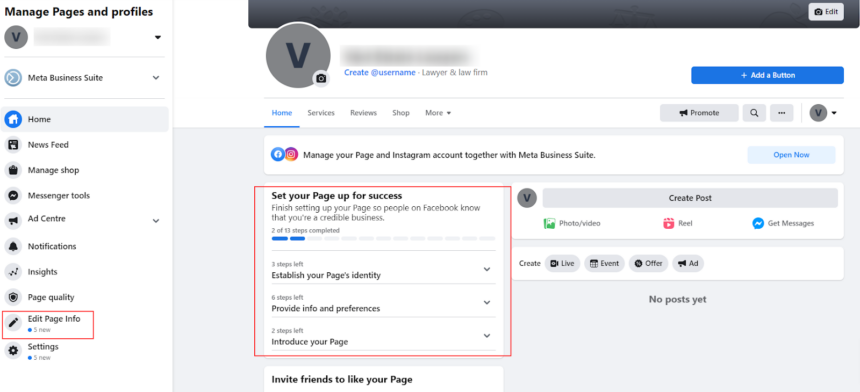
Step 5. Editing your page information
- You will now be redirected to your newly created page, where you can add additional information about your business.
- You can either go through the “Set your page up for success” section on the main page screen. It will show you the remaining sections you can update. Or, you can click on “Edit Page Info” on the menu on the left:
- Selecting “Edit Page Info” will open a new page where you can add all your business information in one go. The information you add will be saved automatically—this will be indicated by the pop-up that will appear on the screen briefly to say that your changes have been saved.
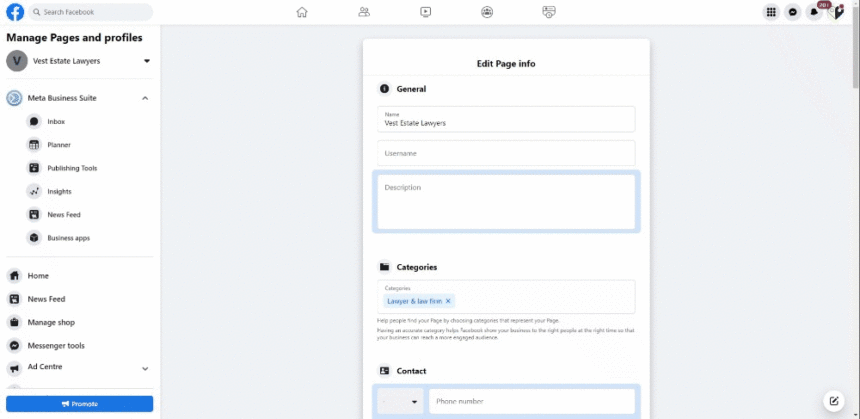
Note: the system may not record your choice if you switch between options too quickly. Make your selection or add your information and wait until the data is saved.
Creating Multiple Business Pages (Brands and Multi-Location Businesses)
You must own at least one Facebook Business Page before you can manage multiple pages under one account/dashboard. This is important because you must have created a main page first so that other pages can be linked to it.
Step 1. Log in and locate your page
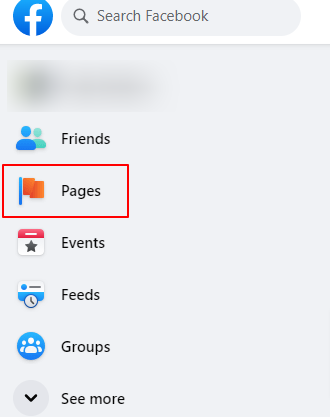
- Log in to your Facebook account.
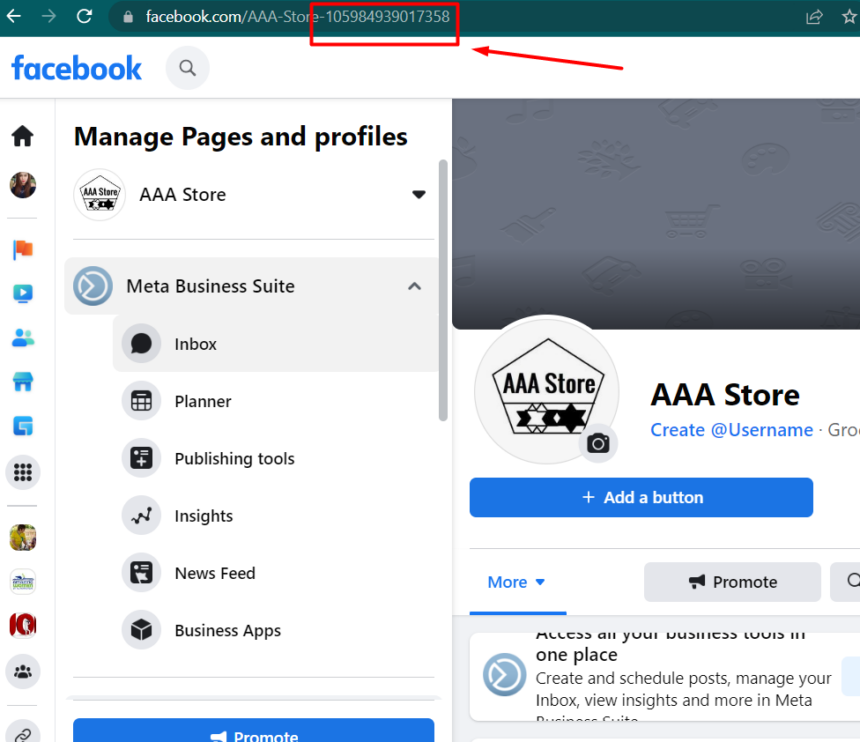
- From the menu on the left, select “Pages” from the available options:
- Open your page.
- Copy the string of numbers at the end of your page URL—this is the page ID:
Step 2. Linking your page
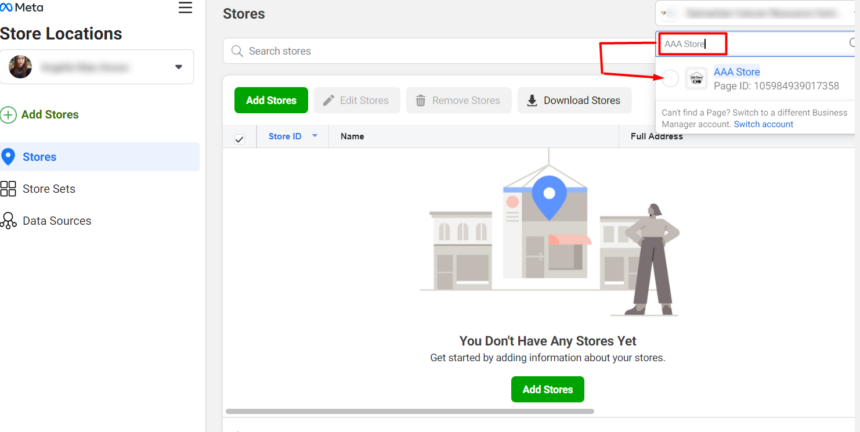
- Go to https://business.facebook.com/business_locations/.
- Paste the number you copied into the search bar at the top right corner of the page and select your page when it appears as a suggestion:
- If the page is relatively new, you will see this message (below). In this case, you will need to come back after two days to proceed further.

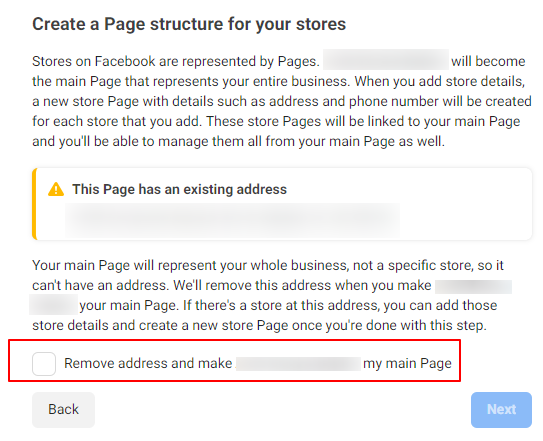
- One thing worth noting is that the main page should not have an address. Therefore, you will need to remove it or select a check box if you will see this message when you will try to proceed next time:
Step 3. Ensuring your main page is set up correctly
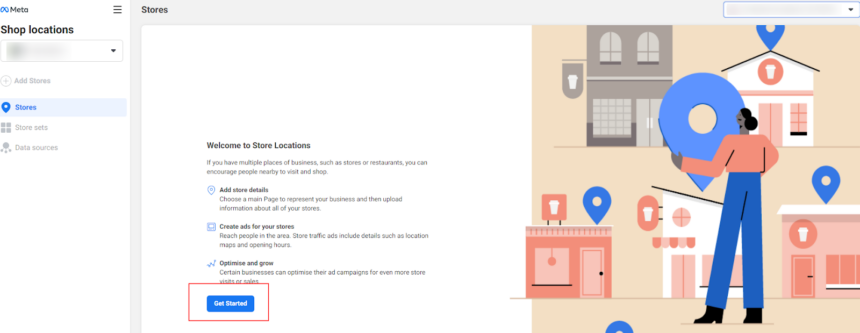
- After two days, if the page is ready, it will display the “Get Started” button on the main page screen:
- Check the box to confirm that you wish to make the current page the main page of your business/brand.
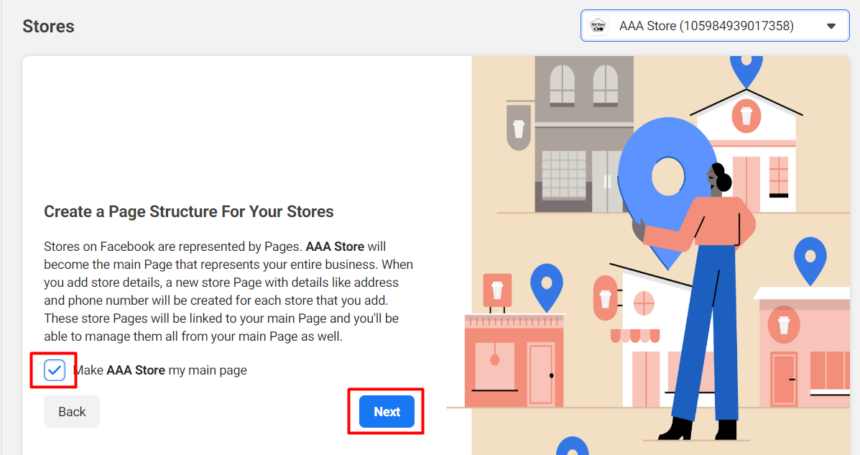
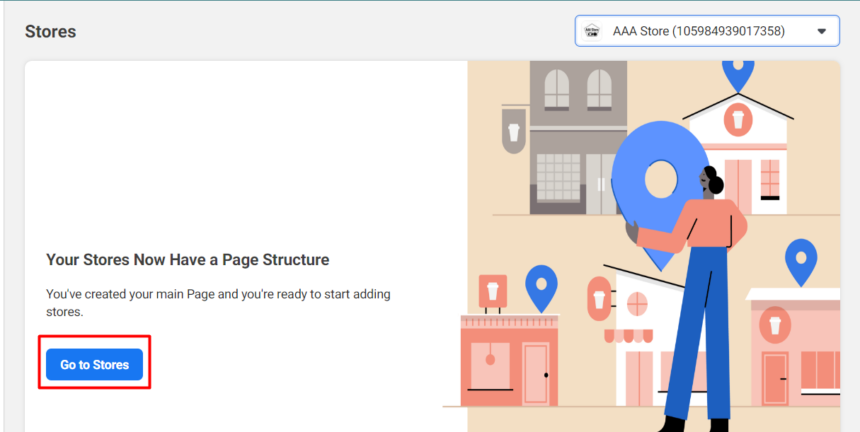
- This will create the required structure where all location pages will be hosted under the main page umbrella. Now, you will have access to the main dashboard where you can manage your stores. The first thing to do is to add your remaining locations.
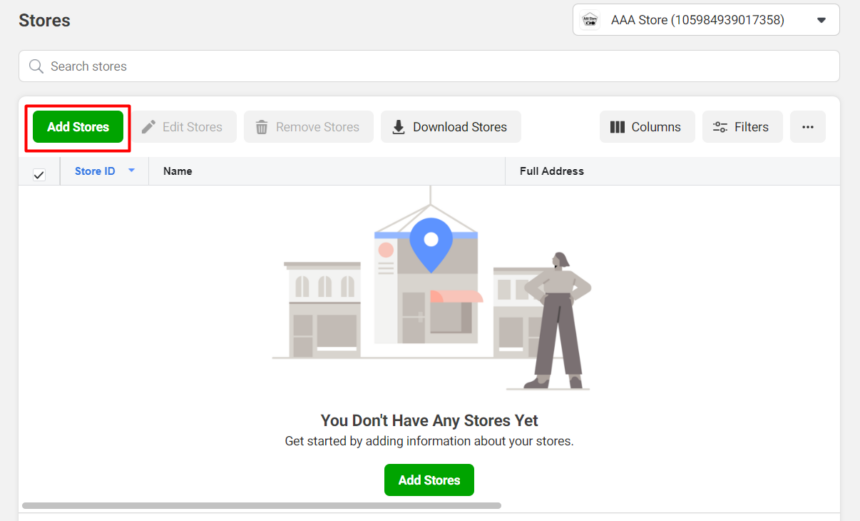
Step 4. Adding location/store pages
- Click on the “Add stores” button.
- Select how you wish to add a new page. There are several options available:
- Add manually
- Add multiple stores
- Connect via API
- Connect a Page
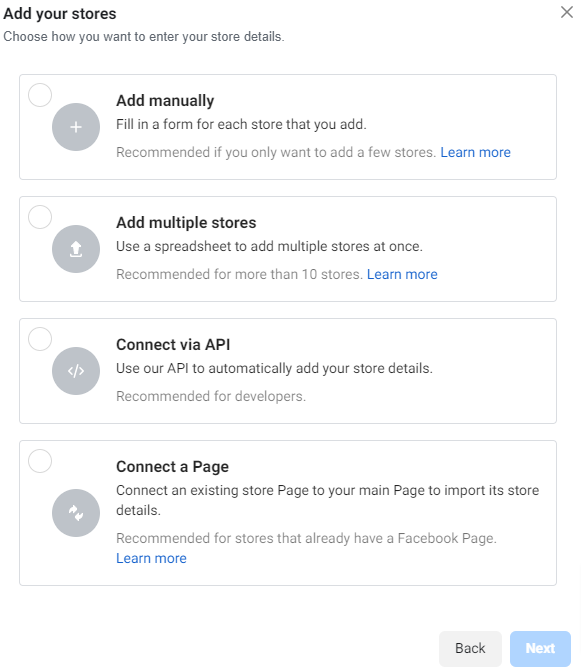
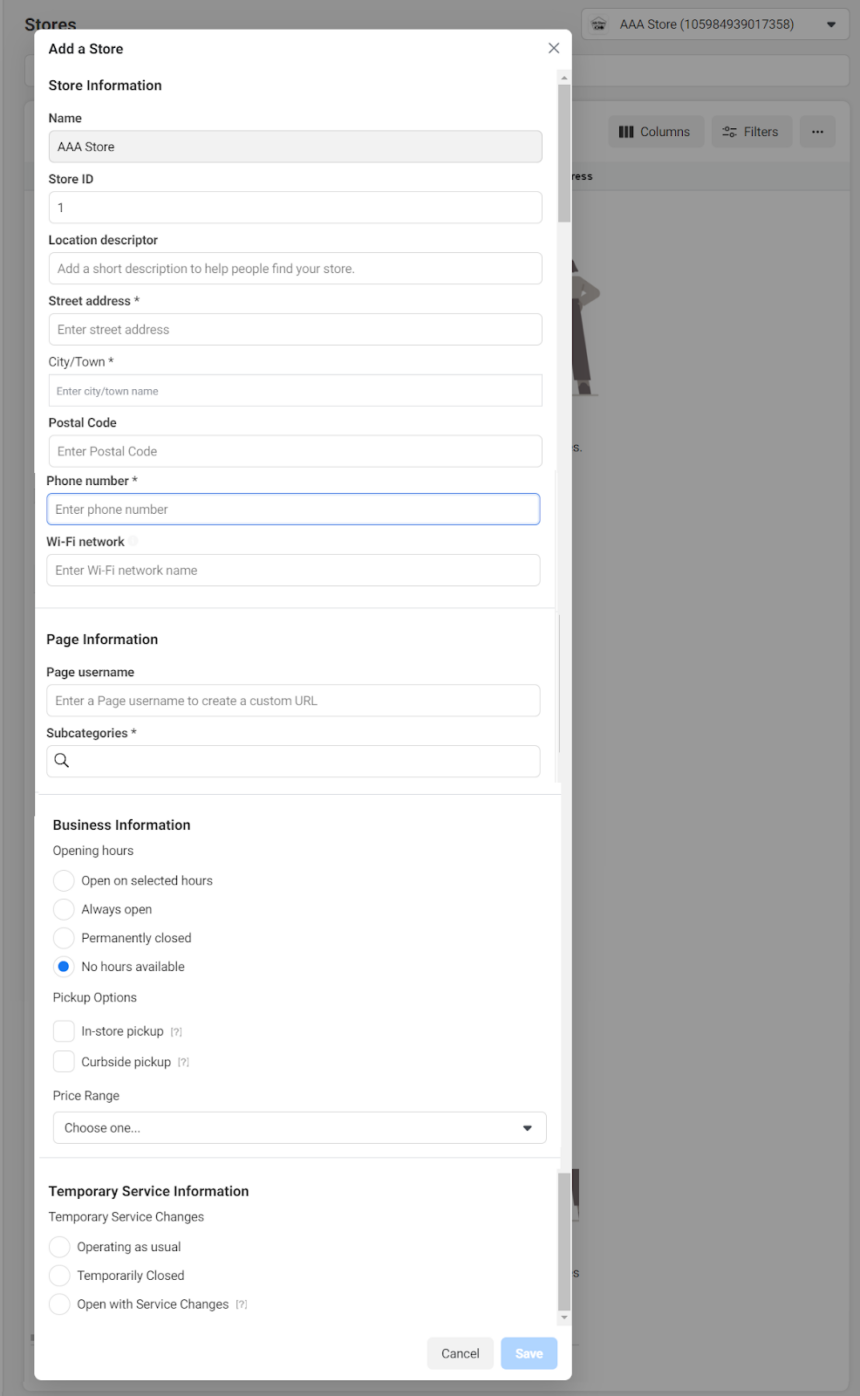
- If you only have a handful of pages to add, then the first option (Add manually) is the best. It will ask you to add basic information about the business:
- The business name will be pre-filled as Facebook assumes all locations share the same name as the main page.
- The default name will be the existing page name with a location descriptor. The location descriptor is “(City)” or “(Address, City)” if there are multiple locations in the same city. The name can be changed later in the page settings.
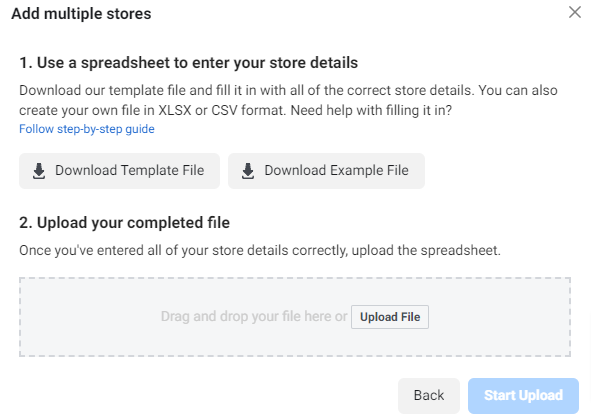
- If you have more than ten locations, they can be added in bulk via a file upload.
- The second option (Add multiple stores) is the best for that – it will also provide you with an example template that shows how it should be filled in and the blank template you can use for your stores:
How to Request Access to Claimed Pages
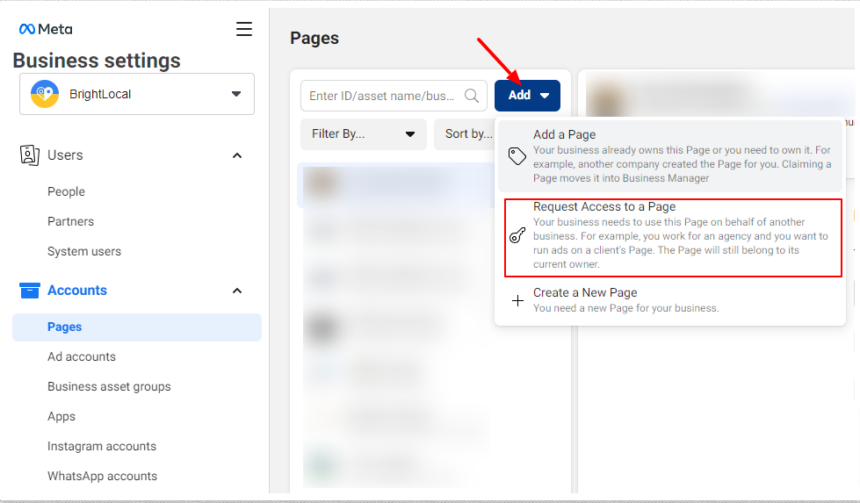
- Log in to Facebook and go to https://business.facebook.com/settings/pages.
- Click the “Add” button and, from the drop-down, select “Request Access to a Page”:
- Enter the Facebook Page name or its URL.
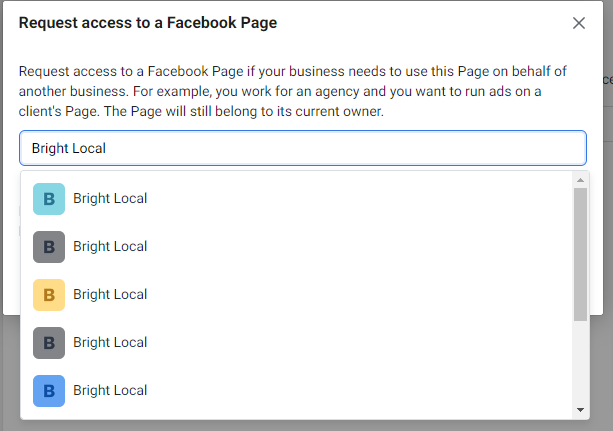
Tip: It’s better to search for your page using its URL as, when you type the name only, you can be presented with several options. It may not be clear to understand which page you need to select—unless you want to claim them all—or which pages are yours.
- Once you have selected the page, use the toggles to choose which permissions you need. If you want to keep the business information up to date, then it’s best to request full control.
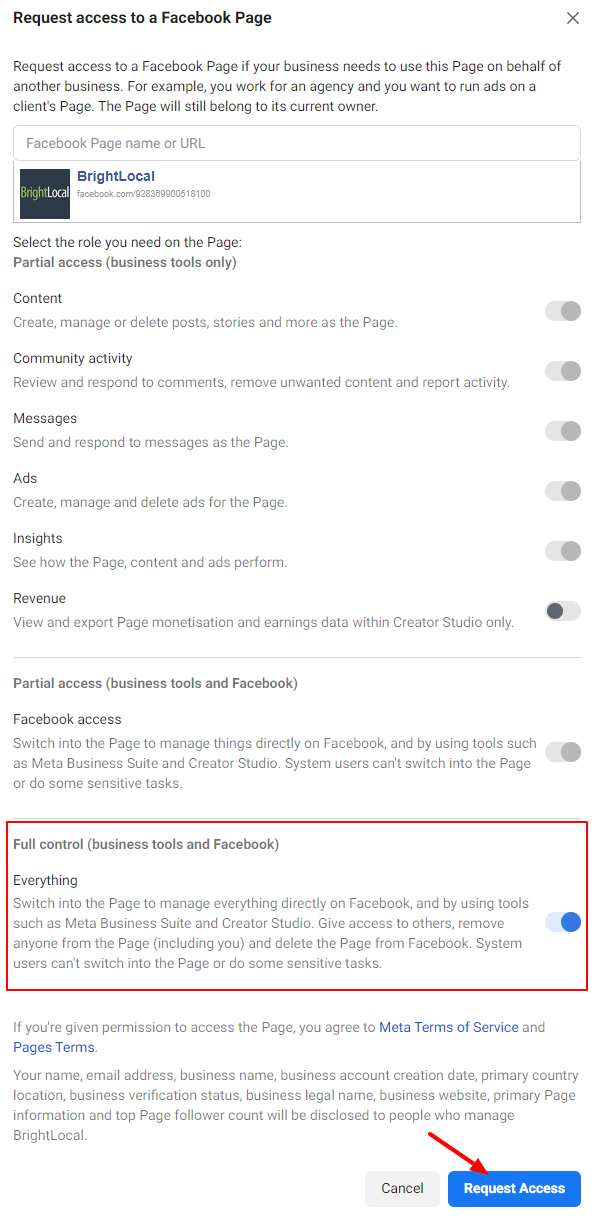
- Click Request access.
- This request will then appear in your dashboard as “Pending”.
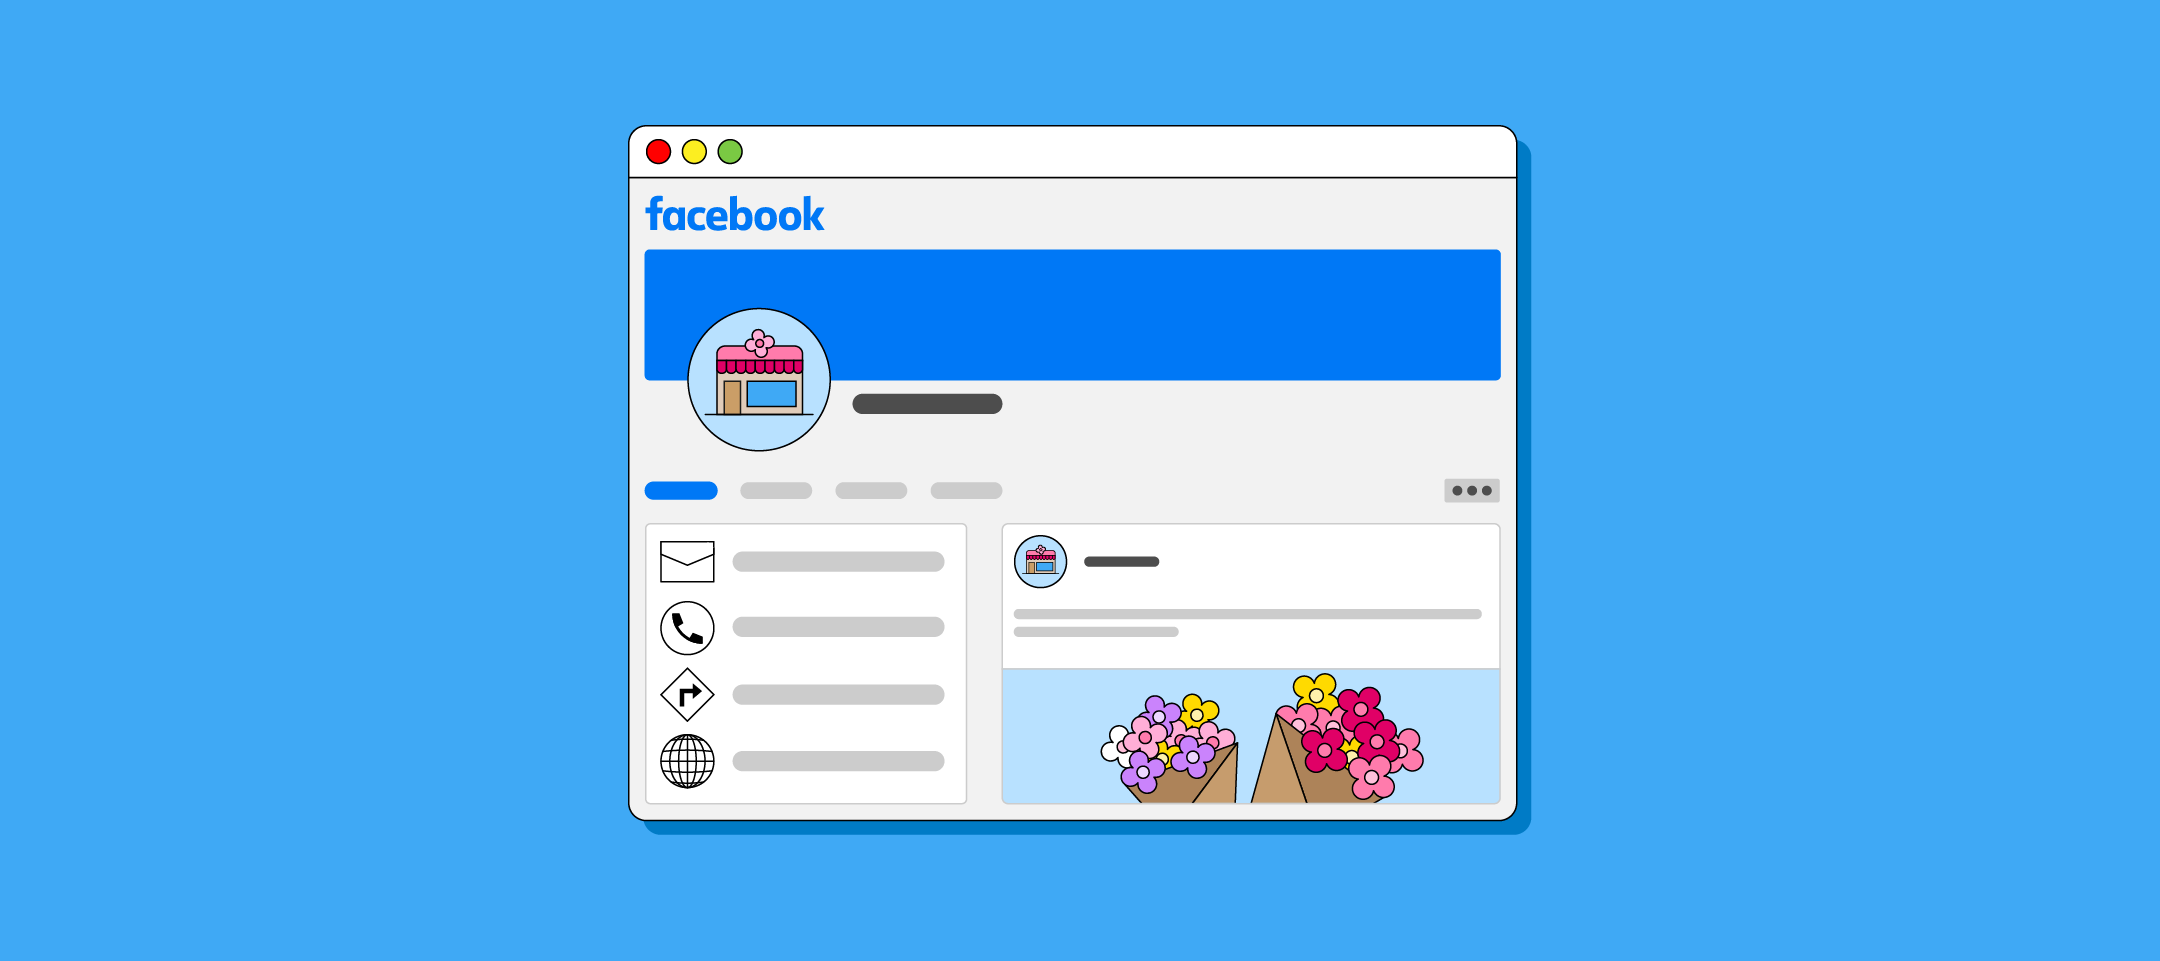
Managing your Facebook Business Page
We hope these steps have helped you with the first step of adding or claiming your Facebook Business Page. For tips on getting the most out of your Page, optimizing its layout, and even asking your audience for Facebook reviews, head to our guide on how to manage your Facebook Business Page as a local business.