


Google Business Profile (formerly known as Google My Business) is one of the most effective tools for local business marketing. Without a Google Business listing, businesses are unable to feature in the Local Pack or Google Maps, which should be a key goal for local businesses.
Creating a Google Business Profile for your business, or the local businesses that you’re working with, is an essential first step towards SEO success. Setting this up properly is critical, so this comprehensive guide will show you the best way to create a Google Business Profile to add your business to Google local search results and Maps.
Step-by-step: How to create a Google Business Profile
1. Create a business Google account
Before you can create a Google local listing, you’ll need to create a Google Account specifically for your business. Google Accounts are available to everybody and are simple to use.
You can either use an existing email to set up your Google Account, or you can make a new one. Visit accounts.google.com and select ‘Create an account’ to get started.
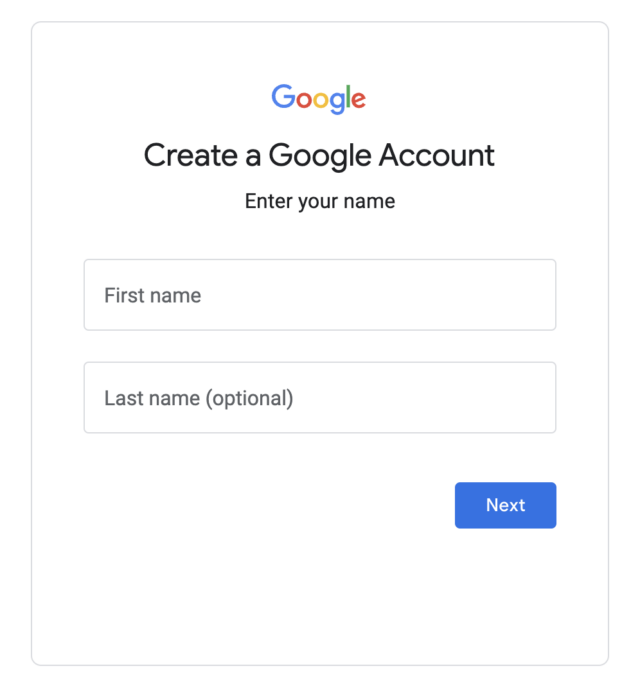
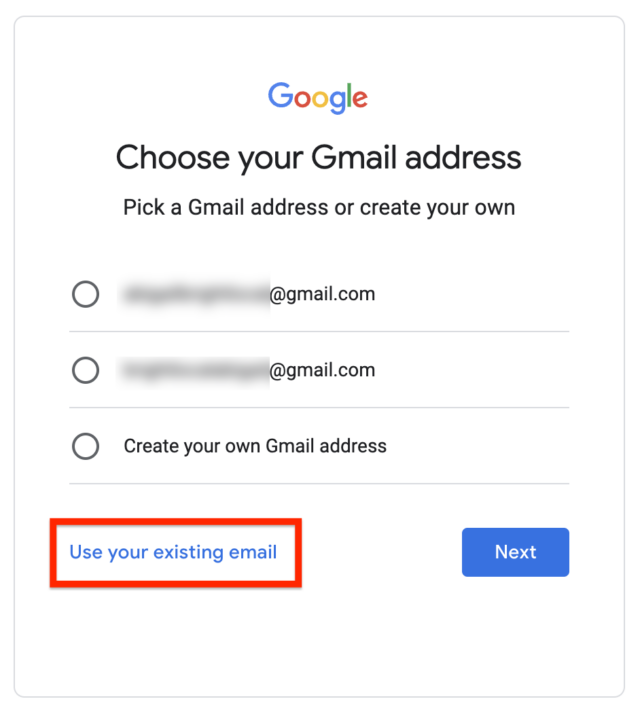
As you go through the process of creating a Google account for your business, you’ll be asked to choose a Gmail address as well. This is where you will be given the option to use your existing email.
Follow the prompts until you have your new account. Google notes that in a Google Account specifically for your business, you can turn business personalization on. This will make the process of setting up your Google Business Profile easier.
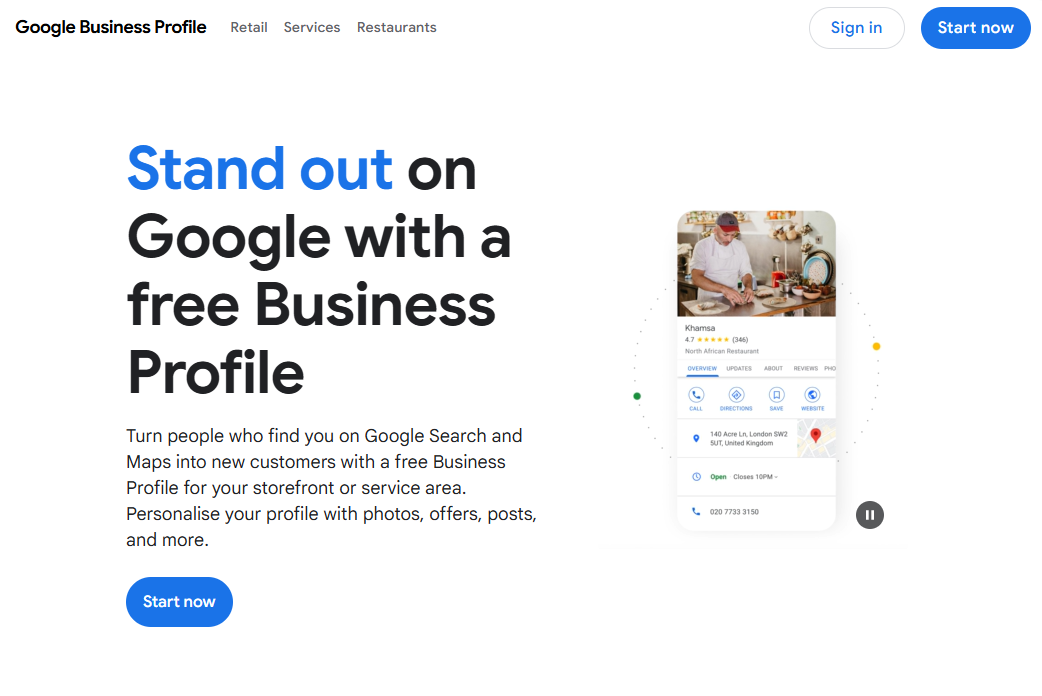
2. Visit the Google Business Profile gateway
Once you have your new Google Account, head to google.com/business and click ‘Start now’ to get started:
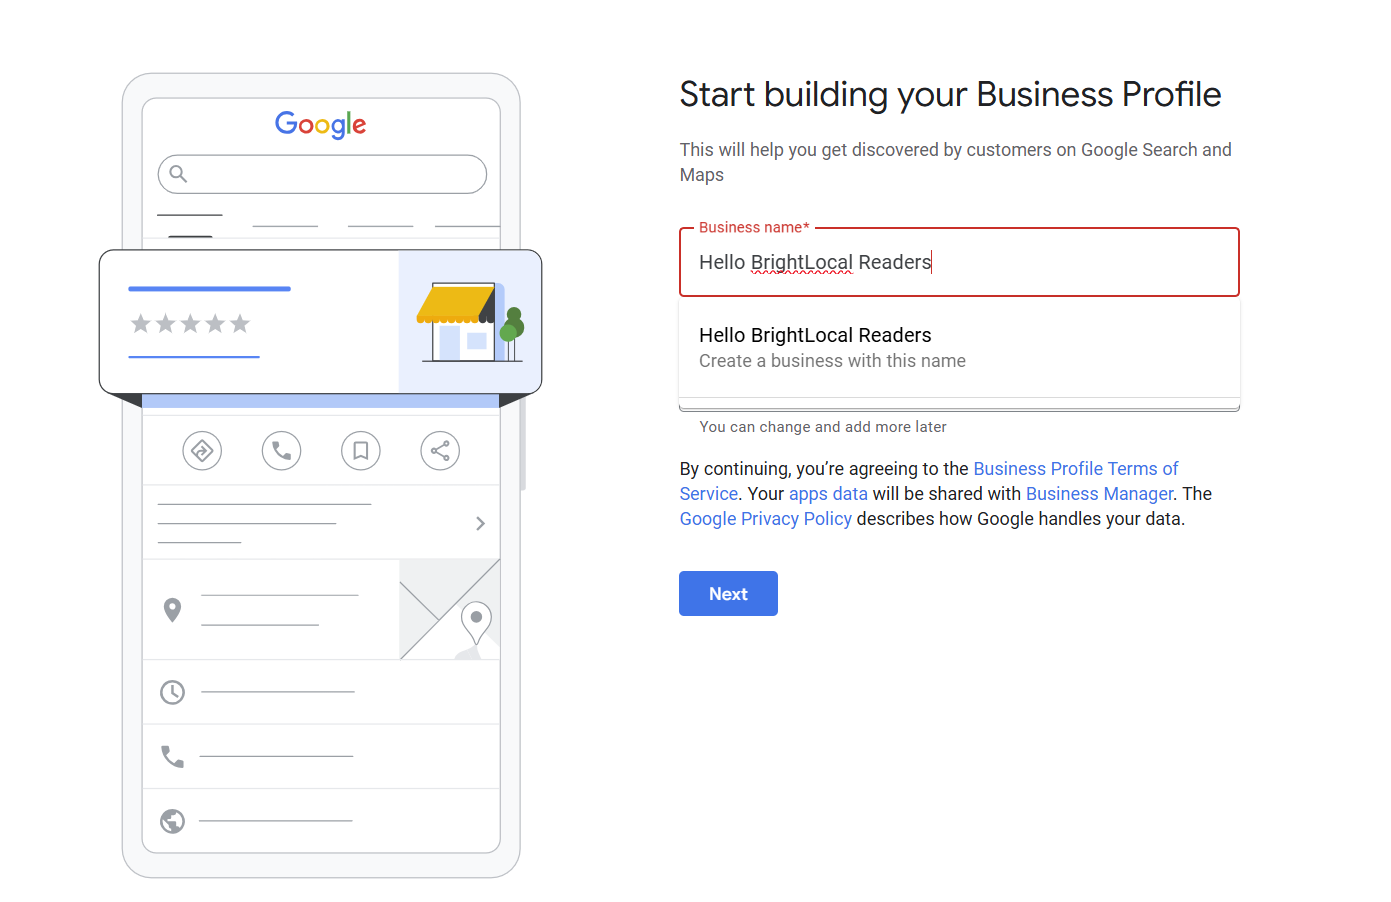
3. Look for the business
Begin by typing in the business name to see if a profile with this name already exists. If it does, then you’ll see it appear as you’re typing. If the business name doesn’t appear, then go ahead and click ‘Create a business with this name’.
The name that you use here should exactly match the official business name. Don’t be tempted to add any keywords to the name, as this violates Google’s guidelines.
You’ll also need to pick your business category from the drop-down list. You’ll have the option to edit this within the profile later, as well as to add additional categories, so don’t worry if you’re not completely sure what to select right now.
For guidance, check out our advice for local businesses on how to choose the best GBP categories.
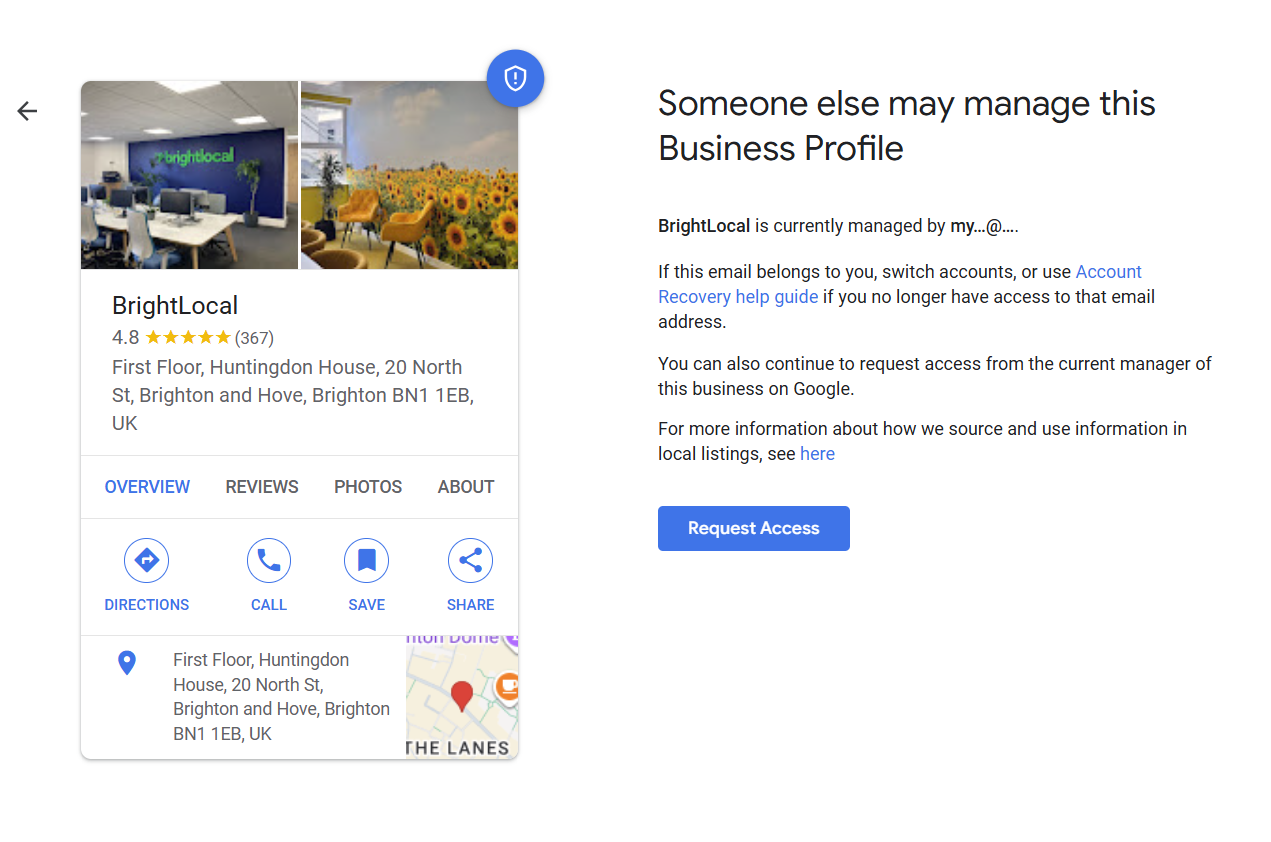
Requesting access to an existing Business Profile
If someone has already created a Google Business Profile for the business, then don’t worry. You can request that management of the profile be handed over to you. Simply click ‘Request Access’, and you’ll be guided through the process.
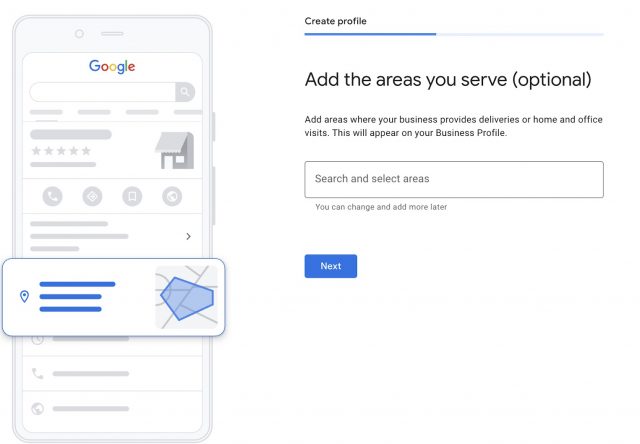
4. Choose your business type
You’ll now need to share how you service your customers.
If you’re a Service Area Business (SAB), where you don’t allow customers to come to you, and only visit customers or provide home deliveries, choose ‘No’ to adding a location. You’ll then need to add the areas you serve.
You’ll be able to come back and edit this information later, and you’ll be able to add new locations any time the business expands.
Warning: Don’t be tempted to inappropriately say the business has a physical location in an attempt to manipulate local rankings. The listing may get suspended or removed entirely in the future for violating the guidelines in this way.

If you have a location that customers can visit for face-to-face interactions, you’ll need to share your address.
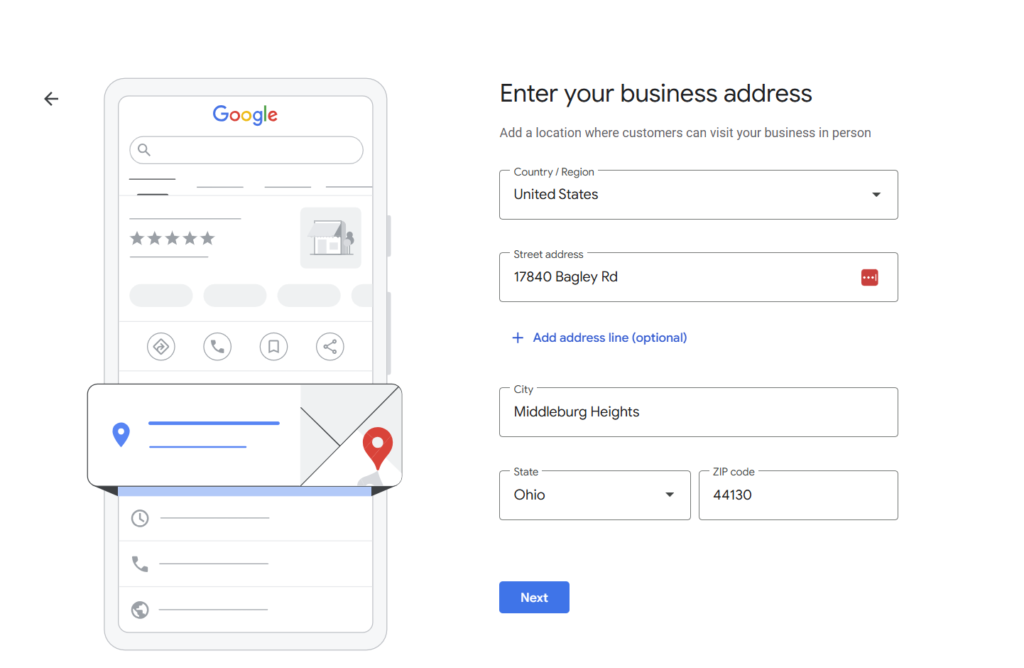
It’s important that the address you give is accurate and complete to prevent any confusion for customers or issues with the verification process. Google may ask you to confirm your location on the map if it’s confused by your address.

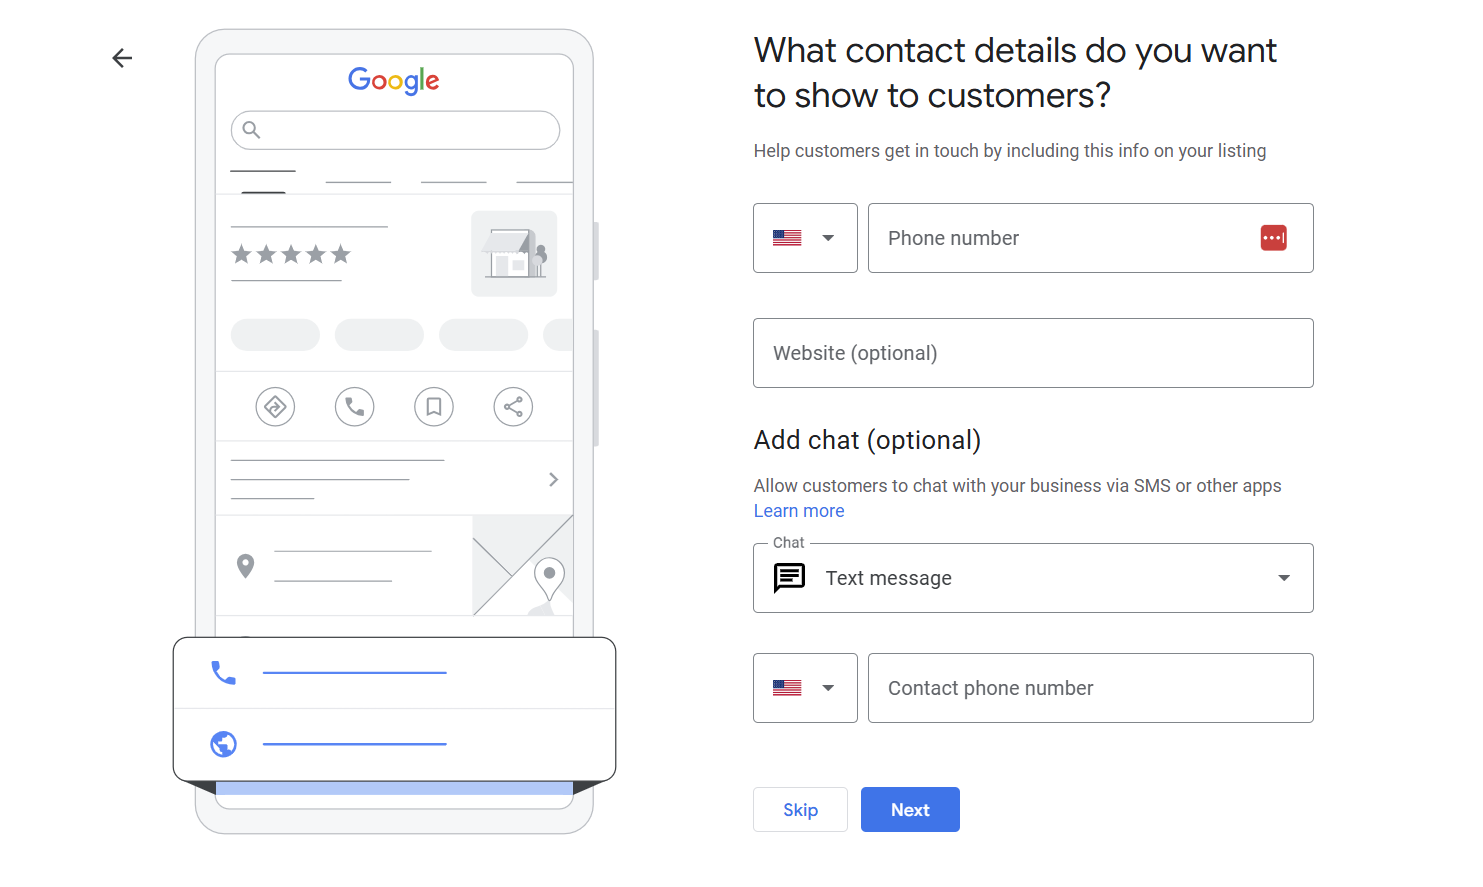
5. Add contact details
The next step is to add the contact details for the business.
First, you’ll need to enter the proper phone number for your business. Remember, this is where you’ll be receiving calls for the business, so use a number that will be answered by a member of the team.
Adding a phone number isn’t compulsory, as long as there is an alternative way for customers to reach you.
Note: if you’re an agency setting up GBP for a client, you’ll need to enter the client’s contact details, not your own. It’s a good idea to communicate clearly to your client that they’ll be contacted by Google for the verification process, which we’ll explore shortly.
If your business doesn’t take phone calls, you can add your website link instead.
Some businesses also choose to allow customers to chat using SMS or WhatsApp messaging. You should only use this if you are confident that you can quickly get back to customer messages. Being unresponsive to messages will create a poor user experience and could harm your business reputation.
6. Verify business
In this step, you’ll be required to choose a verification method to prove the business is operating at the specified address. Read our step-by-step guide to GBP verification to help you through this often tricky process.
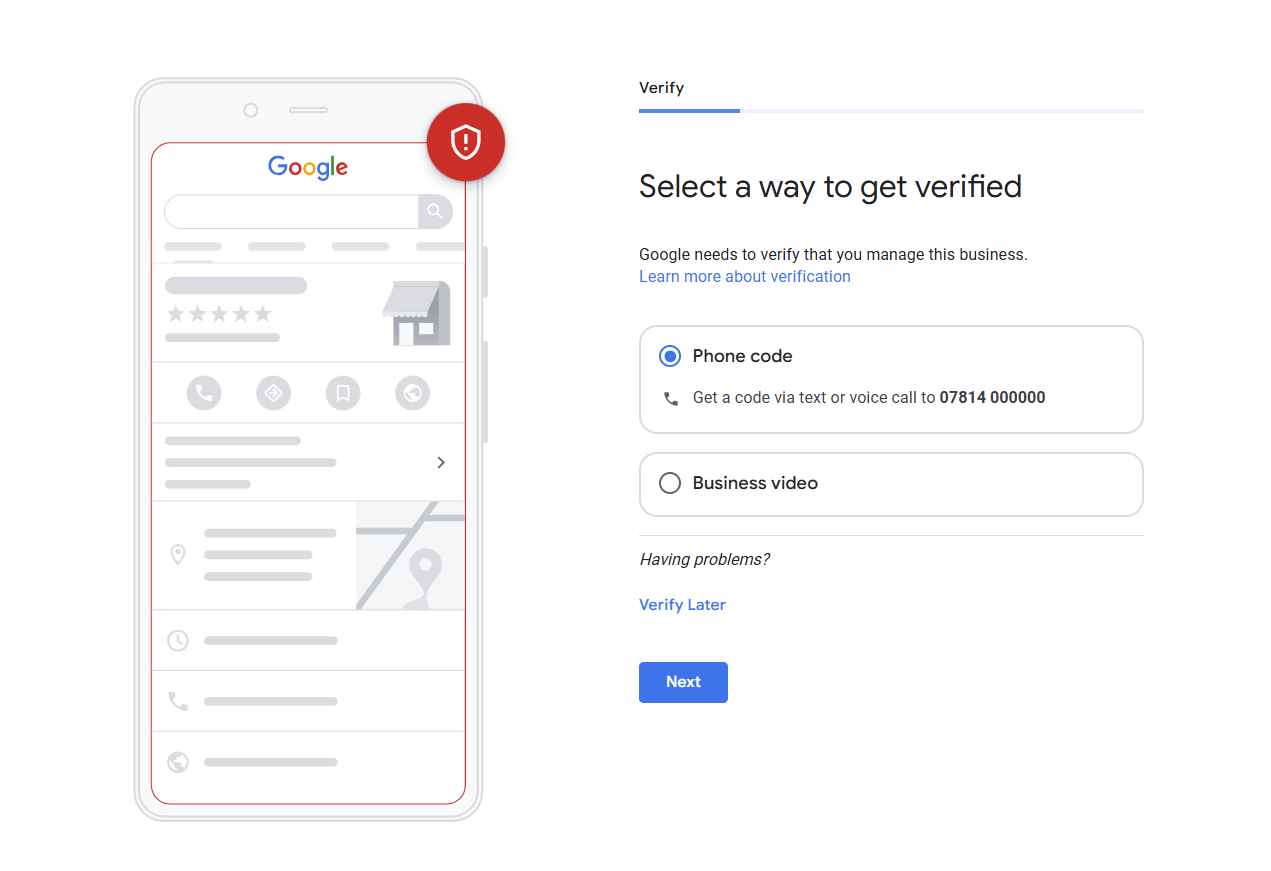
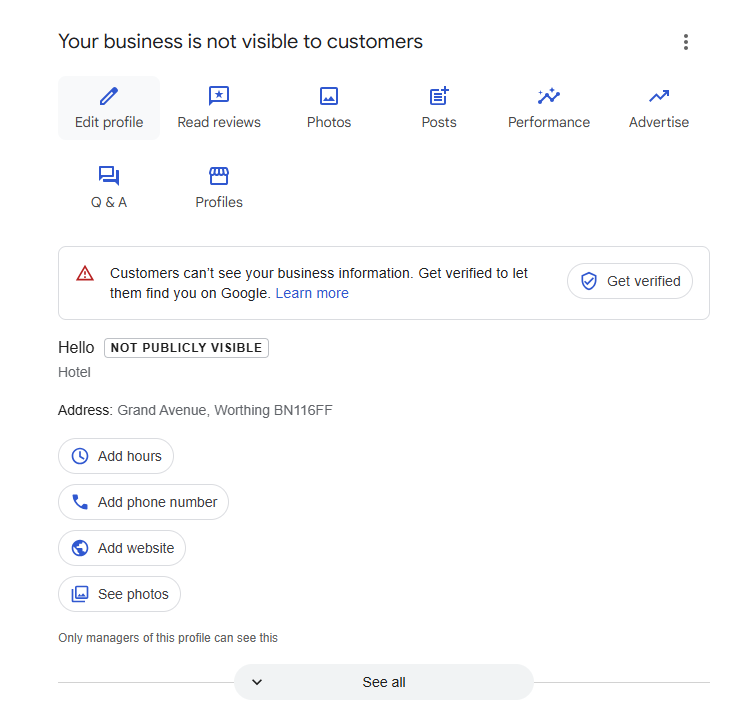
You can skip verification, but your Google Business listing won’t be visible to customers until you complete it, so start as soon as you can.
Common verification methods include:
Video verification
This type of verification has become the most common way for businesses to get verified. Make sure you’re at your business location and have everything ready to prove your location when you start recording.
Phone verification
Some businesses will be able to verify their accounts over the phone, but this option isn’t available to everyone. If you’re eligible, then you’ll see this option on the verification page.
If you decide to use this method, then you’ll receive a code via an automated phone call.
Email verification
As with phone verification, the email alternative isn’t available to everyone.
If you do have the option to verify by email, then you can request a code to your inbox. This will only be possible to the email address connected to the GBP account.
7. Add photos
Adding photos is a fantastic way to help searchers visualize the business and to get a glimpse of the brand. Google has a great guide on what sort of photos you should look to feature on your profile.
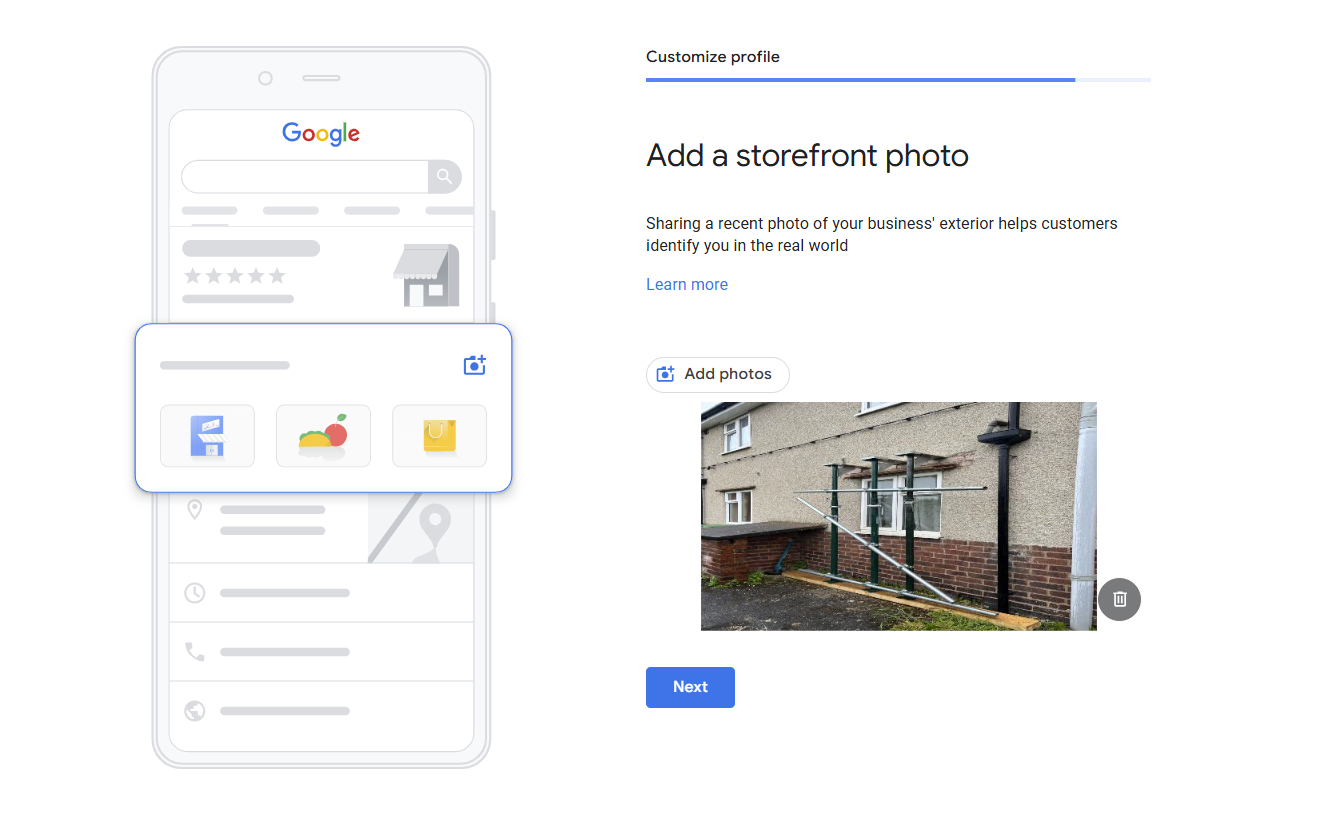
At this stage, businesses with a physical location will be asked to add a storefront photo to help customers identify your business. You can add multiple photos, so don’t feel limited to adding just one if you have more.
Next, Google will ask you to share photos of your products or services. Add as many photos as you’d like to give customers a good understanding of who you are and how you can help them.
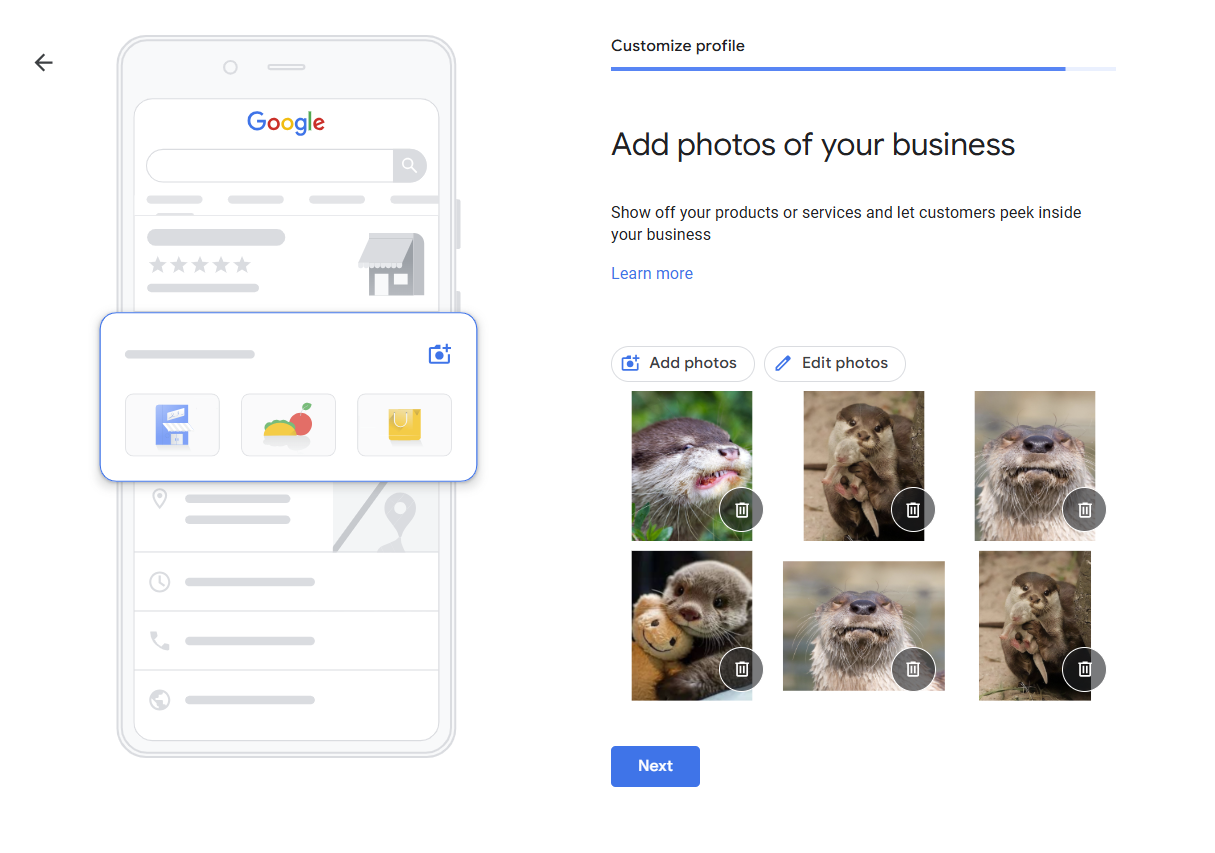
Customers can add their own photos to the listing; some people will choose to do this when leaving you a Google review. This means a carefully curated Google listing can also include customer photos, which you have little control over.
Be aware that you can’t choose the order in which photos appear on your listing, so it’s a good idea to have several of your own photos mixed in with the user-generated content.
8. Set up Google Ads (optional)
You’ll be given the option to advertise with Google Ads when creating a Google Business account. This can always be skipped and revisited later!
9. Set your Google listing live
Once you’ve completed the above steps and Google has approved your verification, your Google business listing will begin to appear in Google local searches.
However, there are still extra optimization options you can make at any point after adding your business to Google. These may differ depending on your business type.
To edit your Google Business listing, search for My Business, then click Edit Profile. Fill out as much information as you can.
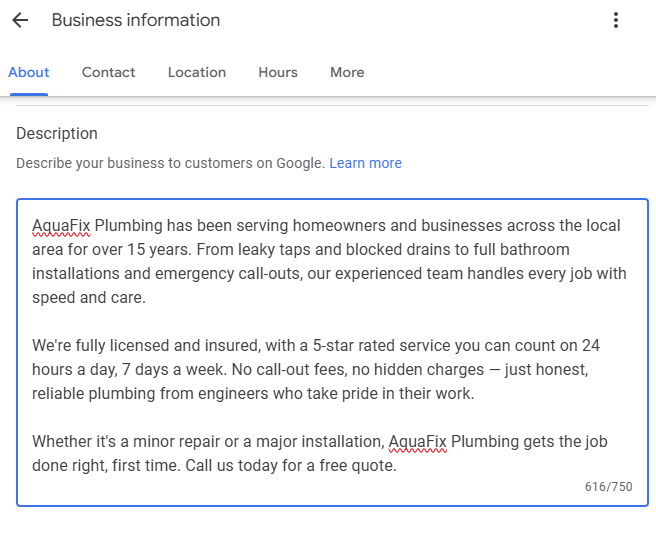
10. Add a business description
This is where you can go ahead and add a description of your business that will be seen on Search, Maps, and other Google services.
It’s a good place to tell your potential customers a bit more about your business in ways that might not be reflected in your profile, such as what sets you apart from other businesses or your beliefs. Unfortunately, not every business category (e.g., hotels) will have this option.
You can write up to 750 characters within this section, so be sure to use this opportunity to put the most important information across in a clear and concise way. Remember that you cannot include URLs here.
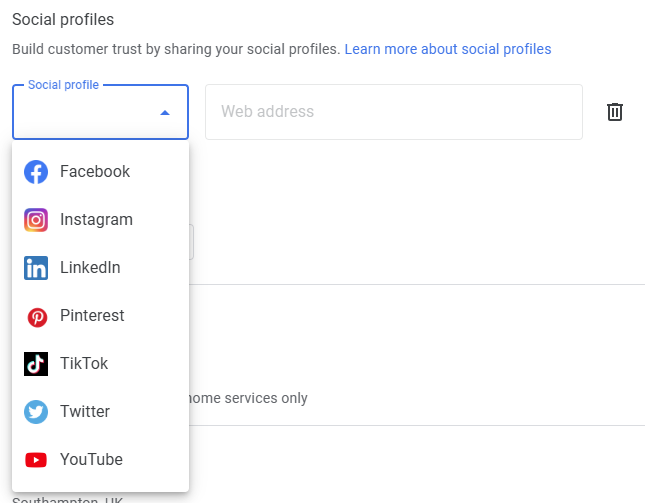
11. Add social media profile links
While Google does tend to pull these from other parts of the web, including your business website, most users will have the option to expand on or overwrite these via a few simple steps.
Under Social Profile, select the social media link you would like to add from the drop-down menu. These include Facebook, Instagram, LinkedIn, Pinterest, TikTok, Twitter (or X), and YouTube. You’ll need to add the web address link for each.
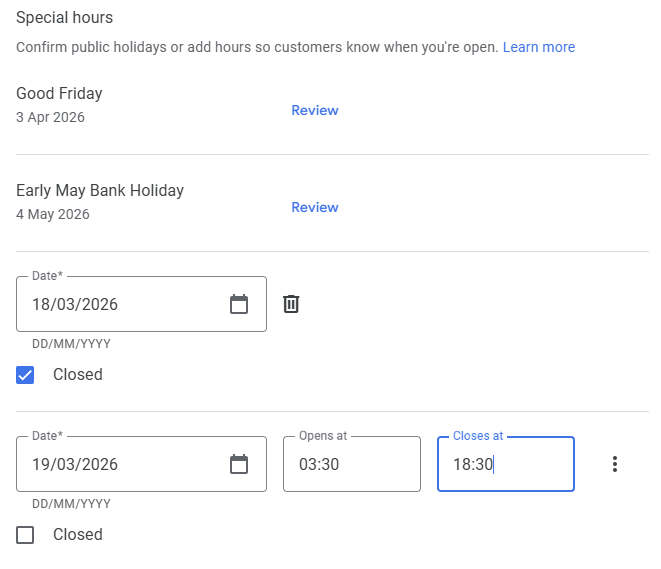
12. Add your opening hours
When you set up a Google Business Profile, adding your business hours is essential so that potential customers know when they can visit or contact you.
Set your ‘main hours’ (your normal opening hours) by choosing either an opening or closing time. You can have multiple opening hours in a day (for example, a restaurant that opens for lunch and dinner service), or set specific hours for services such as drive-throughs, online operating hours, and happy hours. You can also set opening hours to 24 hours a day.
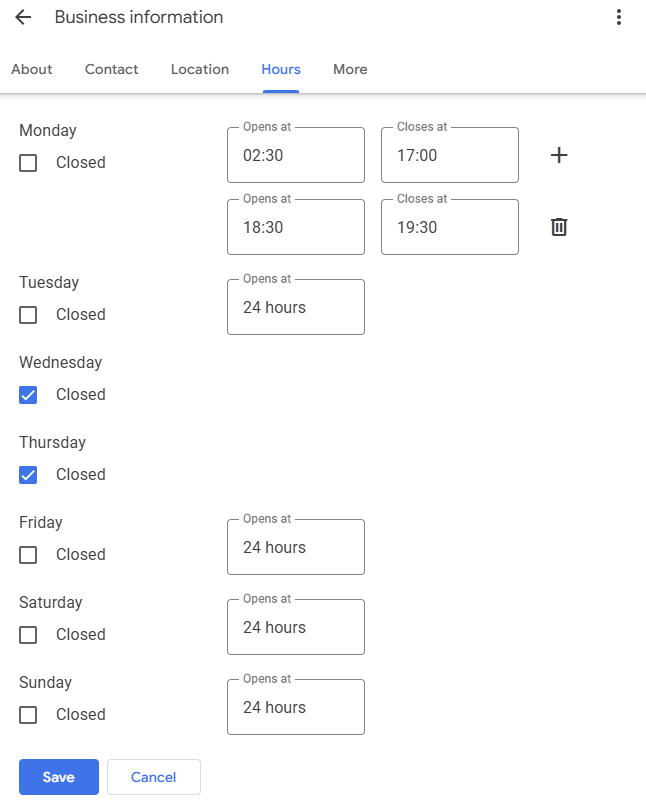
It’s imperative that the hours you specify are accurate, and you should always edit this information if your opening hours change—whether permanently or temporarily.
There are several reasons why your hours of operation may temporarily change, such as public holidays or staff illness. In these cases, it’s a good idea to let your customers know by adding Special Hours. Google may suggest local public holidays, or you can edit any date for any planned closures.
For more information on why this is important and how to do it with ease, check out our guide to managing opening hours in Google Business Profile.
13. Add attributes
Attributes are small but powerful additions to your Google Business Profile that tell customers more about what your business offers. Examples include:
- Identified as women-owned
- LGBTQ+ friendly
- Appointment required
- Language assistance, including ASL
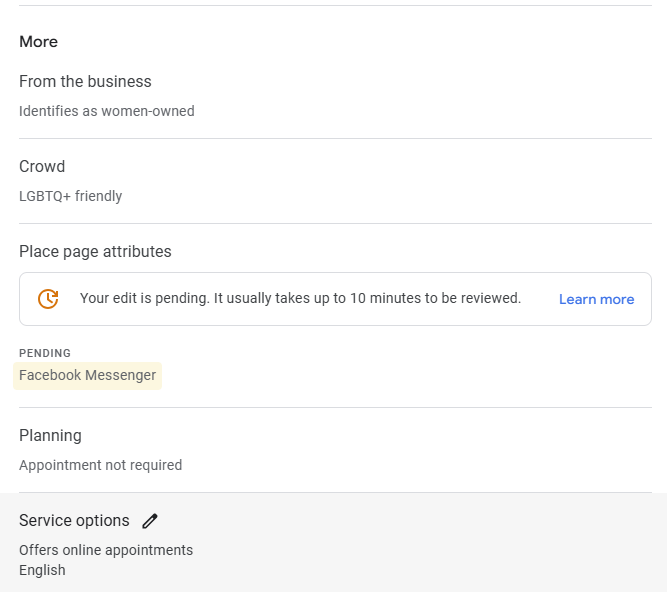
These depend on your business category, so not every option will be visible for every listing. See what’s available for your business, and check back regularly to see if there’s anything new you can add that’s relevant to you.
Optimize your Google Business listing
Setting up your Google Business Profile is just the beginning. Once your listing is live and you’ve added your business to Google, ongoing optimization is needed to maximize visibility and conversions. Some essential ongoing tasks include:
Adding photos and videos regularly
Google rewards active profiles. Fresh photos signal that the business is open and engaged, and listings with photos receive significantly more direction requests and website clicks than those without.
Create Google Business Profile Posts
Google Posts lets you share offers, events, and updates directly on your listing. They appear in Search and Maps and are a simple way to give customers a reason to choose you over a competitor.
Request and respond to Google reviews
Reviews are one of the most influential local ranking factors. Ask satisfied customers to leave a review, and always respond to positive and negative reviews alike. It shows you’re active and builds trust with prospective customers.
Upskill in GBP optimization
For expert advice on optimizing your GBP listing, check out this free course by Claire Carlile over on BrightLocal Academy. To learn more about GBP—and to become a local marketing pro—you’ll also want to sign up for our newsletter!